Cooperative viking survival simulator Valheim was released in Early Access on Steam. The game is gaining popularity with great speed. However, technically, things are not so smooth. In particular, setting up a regular game with friends in the same world was not easy. In this guide, we have collected all the known information on how to create your own server and connect directly through Steam.
How to download and install SteamCMD
Valheim has both single-player and co-op modes. You can start your own personal solo adventure, however the world of Valheim is rich in various activities, so it is much more interesting to explore it with friends. Today you can already try a cooperative up to 10 people, for this you need to be on the same server.
For this to work, you must first download SteamCMD. It's quite simple to do, just open one of the first links on Google.
Extract the program to a pre-created folder anywhere on your computer, preferably on your desktop, so it's easy to find.
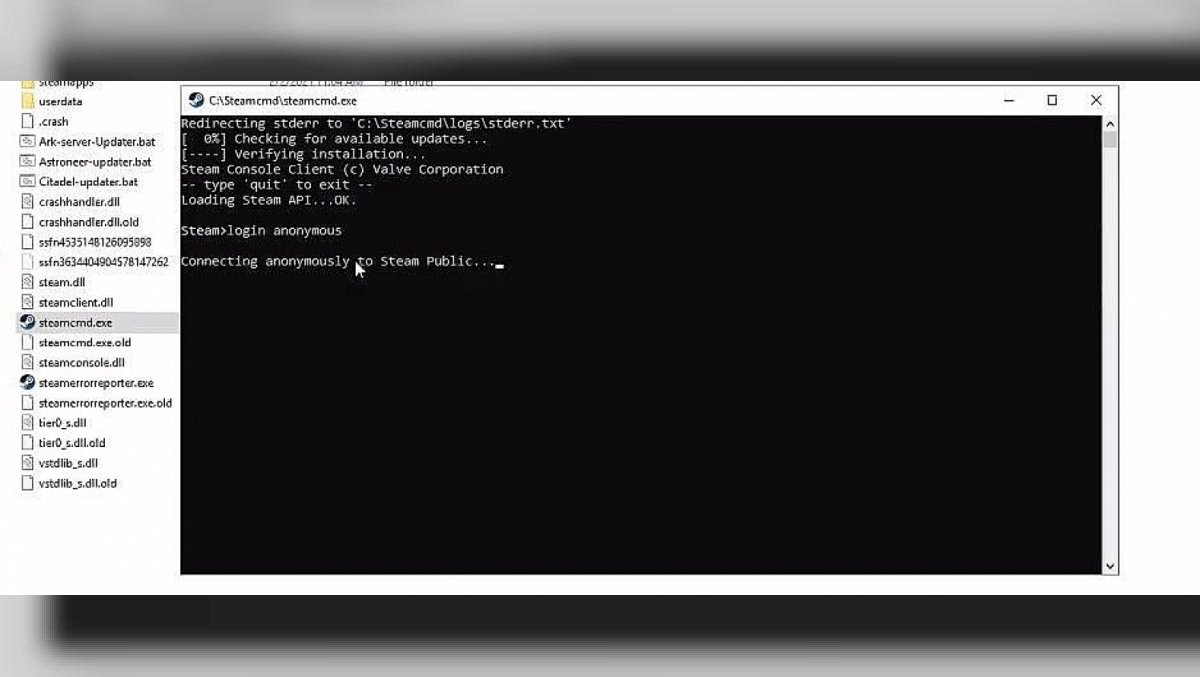
Open steamcmd.exe. In the window that appears, after "Steam>", register login anonymous and press Enter.
This way you can connect to the server anonymously, but that's not all. Next, after the new entry "Steam>", write app_update 896660. This is necessary to install all new updates on the server. The first time it will take a lot of time, in the future the procedure will be faster. After installing all the updates, the entry "Success!" - then you did everything right. Slightly below "Steam>" appears again, where you can write exit and close the window. The procedure must be repeated after each update.
In the C: \ Users \ user \ Desktop \ steamcmd \ steamapps \ common \ Valheim dedicated server folder (the location depends on where you unpacked Steamcmd), you can find the "Valheim dedicated server manual.pdf" file. It also contains instructions for connecting the server, written by the developers themselves. It can be studied in case something goes wrong.

How to set up a server
In addition to the mentioned manual, in the "Valheim dedicated server" folder there will be a file "start_headless_server.bat". Make a copy of it in your server folder. Select edit "start_headless_server.bat". Write what you like in the fields name, world, password. After that, just save and exit.
Make sure ports 2456 through 2458 are open in the firewall of your router and computer. Now you can start the server using the "valheim_server.exe" file. The server is ready when it shows "game server connected". To shut down the server properly, enter any key on an open command prompt.

How to keep the peace for Valheim
You can find your world at AppData \ LocalLow \ IronGate \ Valheim. It is also possible to transfer your single-user saves to a dedicated server if it is located on another computer. Just make sure to have the same "start_headless_server.bat" file on the other device.
If you want your own custom-made world, create a single-player world first. At the very beginning, you will be asked to choose a name for the world configuration and will be shown the name of your seed. Once you connect to the generated world, you can exit the game. Place the name of the world (not seed) configuration you specified in the world column in the start_headless_server.bat file. Once the server starts up again, you will have a custom world generated on a dedicated server.
Direct connection
Go to Steam> View> Servers> Favorites> Add Server. Here you can add the server directly to Steam. Put your computer's IP address followed by port 2457 (default port +1 if you changed it), for example 192.168.1.20:2457. You can now directly connect through your Steam browser to the server. If you are connecting from outside, supply your external IP address. It may appear for a second and then disappear, be sure to double-click on it immediately after updating. However, this is not noticed by all users.

Additional instructions
The password we mentioned above is required at the moment. Do not leave it blank and add at least 5 characters. Make sure the port range is open (2456-2458) in your router and Windows Advanced Firewall. It may not appear until you manually add the range to the adv firewall, both TCP and UDP.
Although at the moment up to 10 people can join the server, the developers recommend no more than 5 for a comfortable game.
To make sure ports 2456-2458 are open in your firewall, open a text editor (we recommend notepad ++) and paste the code:
Windows Registry Editor Version 5.00
[HKEY_LOCAL_MACHINESYSTEMCurrentControlSetservicesSharedAccessParametersFirewallPolicyFirewallRules]
“{E935EE39-A619-401F-A37F-ED9195E7B12D}“ = ”v2.10 | Action = Allow | Active = TRUE |“ Dir ”= Inortheim_2. "
" {63F3B483-4FE0-4AEC-809D-FF2FF5A6BF34} "=" v2.10 | Action = Allow | Active = TRUE | Dir = In | Protocol = 17 | LPort2_10 = 2456-2458 | Name = Valheim UDP IN | "
“{2309BBAA-7066-48E1-94CC-8EECFA4B7827}“ = ”v2.10 | Action = Allow“ Active = TRUE ”Dir = Out“ Protocol = 6 ”RPort2_10 = 2456-2458“ Name = Valheim TCP OUT ””
“{ 8E885DDE-D9FD-4B9A-AED4-AA35F1DF0779} “=” v2.10 | Action = Allow “Active = TRUE” Dir = Out “Protocol = 17” RPort2_10 = 2456-2458 “Name = Valheim UDP OUT” ”
Save the file as Valheim-Firewall.reg and open it.
Note: You must save the file in .reg format, not in .txt format.
This is all the information about the servers in Valheim. Perhaps, with future updates, the process will be easier or will change completely.


Comments
Post a Comment