Continuation of the famous fantasy RPG game with turn-based strategy elements, King's Bounty 2 . Players will have to go on a journey in search of various adventures. In this guide, we'll walk you through all the missions and the consequences of significant choices in the game.
Get out of the dungeon. How to get out of prison
On the start screen, select the character you like and are transported to the Krutsis dungeon. In the future, the character's reaction in various situations and some gameplay components will depend on the initial choice.
Guard Bastian releases Aivar. We take our equipment, talk to the commandant Walbert and buy a crossbow. We hire spearmen and dogs, and then we get a horse. We leave the Krutsis fortress, move straight along the road until we reach New Tyren. We face a small pack of wolves and destroy it.
Axes and wood chips. Who to choose in the task
We turn left from the main square of the settlement and meet Lestor, who will ask for help. We follow the dwarf and on the way to the house of the woodcutters we activate the altar on the left. Having reached the place, we talk with Lupine, one of the instigators, and make a choice:
- Attack Lupine (increases the level of order). After the victory, the dwarf will thank the hero and send him to his uncle for a reward.
- Attack Lestor (increases the level of anarchy). Lupine and his gang are planning to attack the royal carts in the future and invites the hero to go to the dwarven warehouse for a reward.
In the lumberjack camp, we buy dwarves and wolves and follow the marker for the reward.
We get to the Witch's Stone and notice three golems that block the hero's path. The mage can climb the path upstairs and go through the shield to talk to another sorcerer. The warrior will have to engage in battle with stone creatures.
Cold bones. How to solve the puzzle
We go further and on the way we notice a mysterious radiance, so at the nearest fork we go straight to Grace. We get to the indicated point and find a sign with a hint. The hero must light the torch at the statues in the correct sequence:
A portal will open, which will block the player's path. We pass through it and get acquainted with the skeleton of Berengari. He will ask to release him and open the seals in the settlement. The player may have noticed these signs on the way to the tower. They all glow bright gold, and after activation, the tasks will be displayed on the map. We follow to each point and say a spell.
We return to the skeleton, which will ask you to destroy the army of the Spirit of Darkness. We go down the stairs and go into the combat zone. After winning the battle, we approach Berengaria and get a well-deserved reward.
You can also buy ghouls and skeletons from him, but this is not necessary, since the general spirit of the team in this case will noticeably decrease. In this case, the use of the dead is recommended only for the hero, aimed at playing out anarchy.
Letters from the Highlands. Where to find all the scrolls
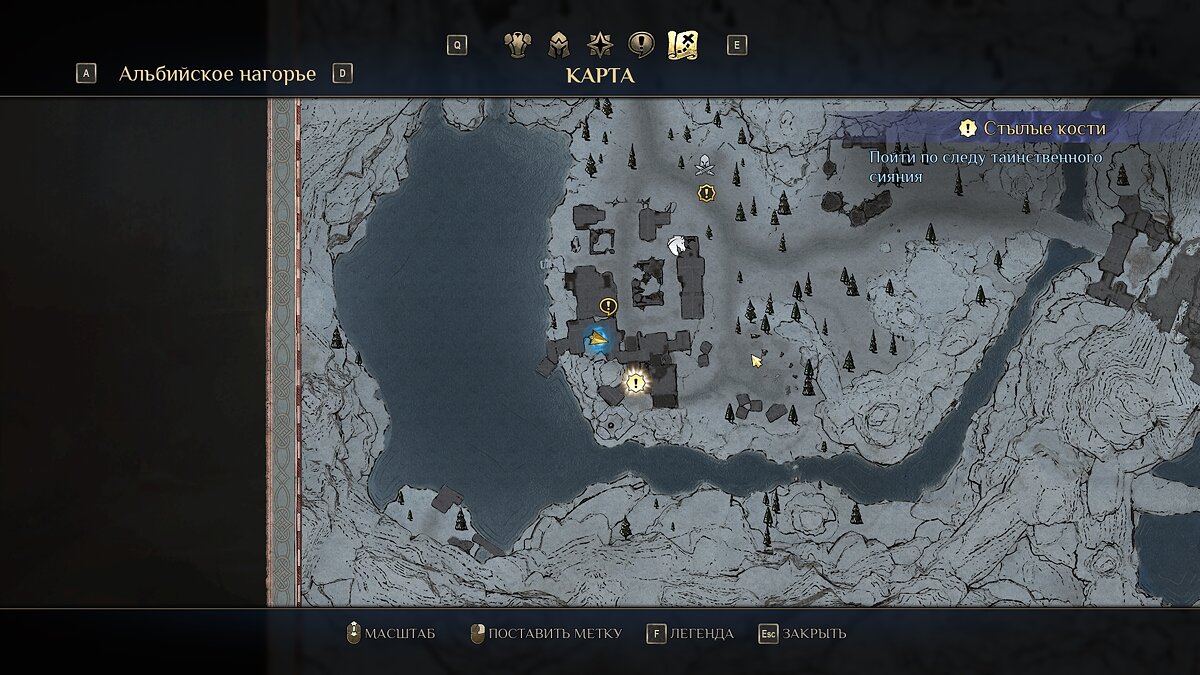
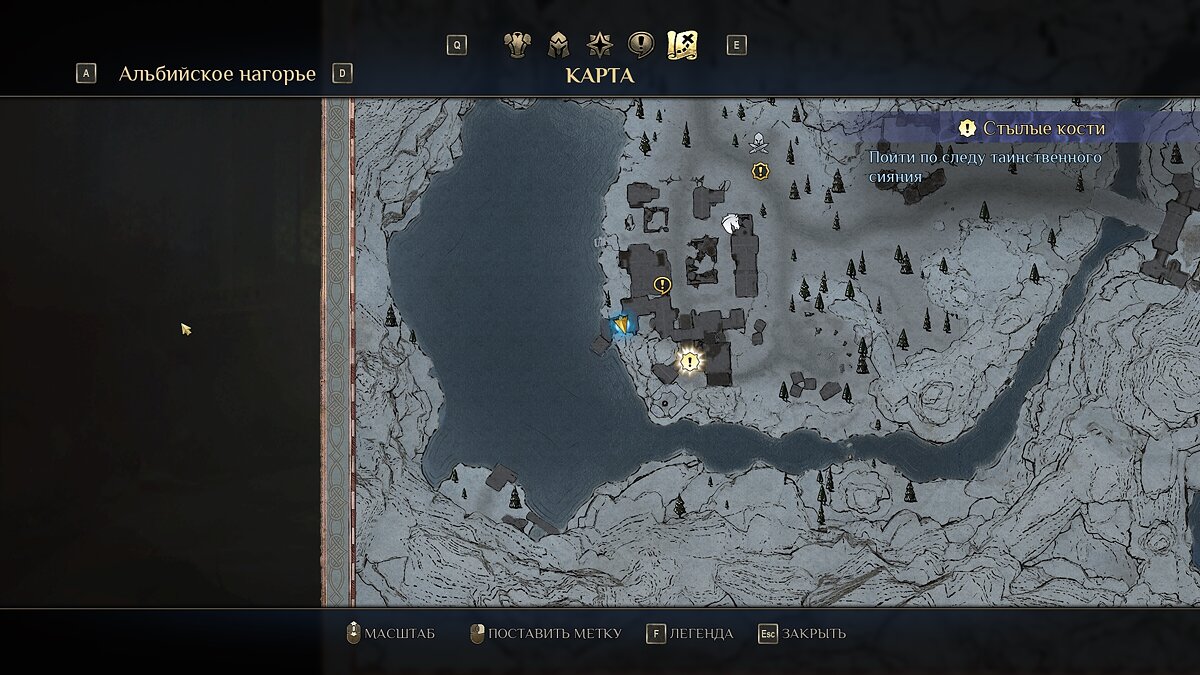
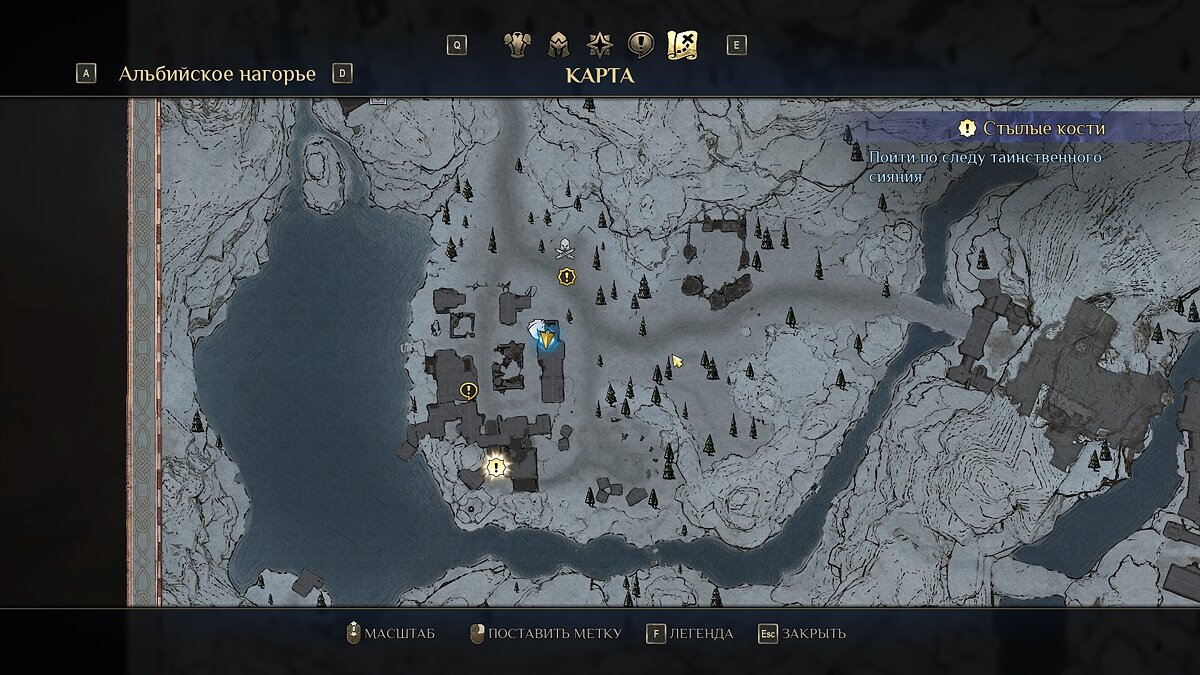
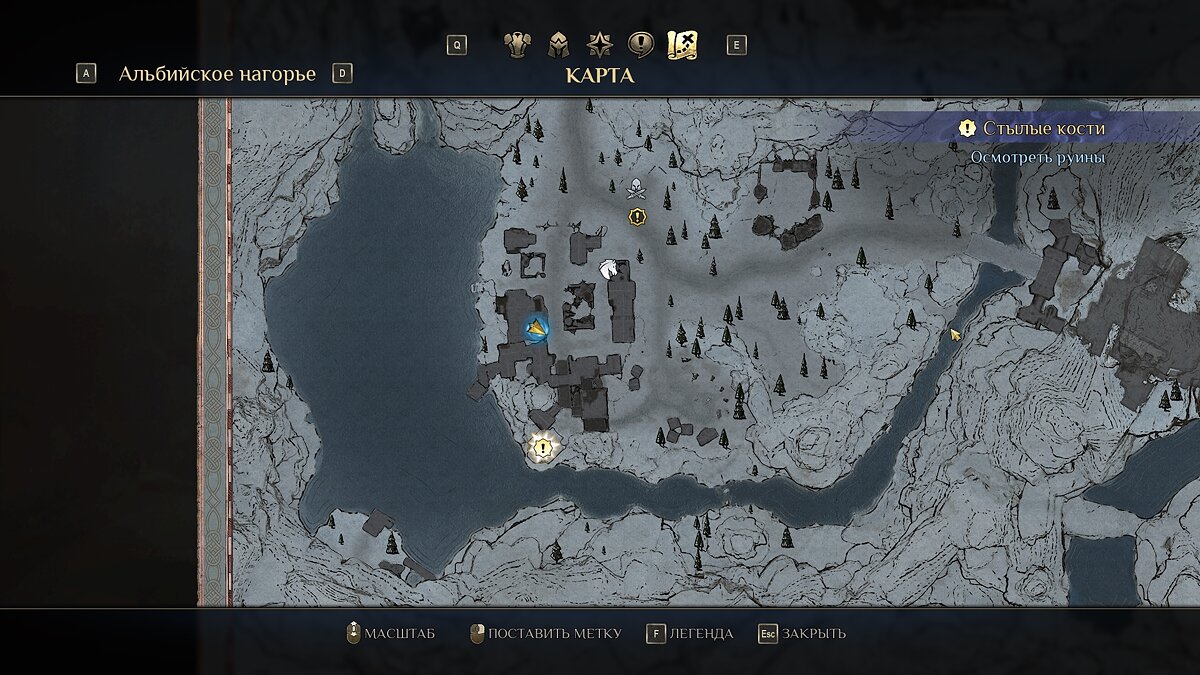
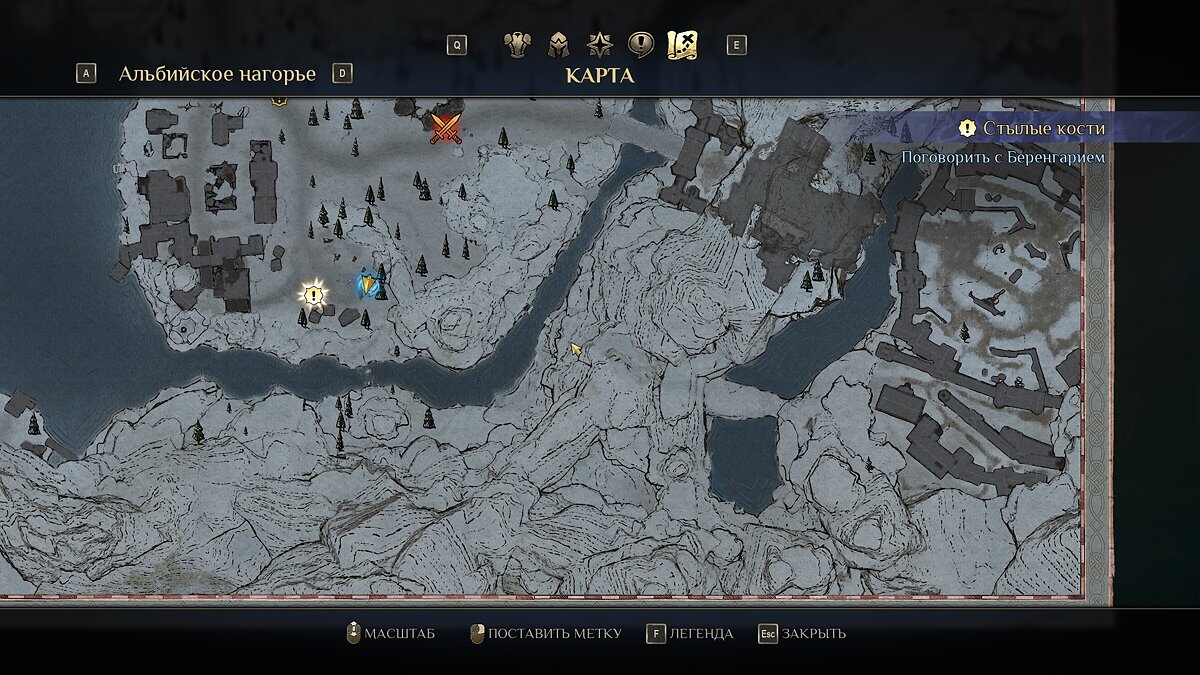
There are five scrolls scattered across the Albian Highlands in Grace to find. Use the screenshots above and collect all the letters. The location of the scrolls is marked with a yellow arrow with a blue aura around it. The latter will lie near one of the graves in the cemetery. We return the collected scrolls to Berengaria.
Ruins of a New Hope. How to complete the task
We return to the fork and find a detachment that must accompany the hero. We can replenish the army at Helena and give the order to Ansel. We move straight along the road and enter another battle.
The witch's stone. How to defeat Amaranda
After the battle we notice the marauder and go after him. We pass through the portal and talk to the man. In this location, you need to find three magic crystals and insert into the corresponding steles. Each of the crystals is located near the point of use, so we climb a little higher and activate all the items. The barrier will fall, and the hero will be able to go to the next room.
We find Amaranda and attack her. In this battle, you will have to fight with three types of elementals, so it is recommended to accumulate more units before attacking. The best set in this situation is the use of dogs, wolves, dwarves, archers and healers. We send the wolves to beat the blue golems, and the dogs and archers to attack the stone one. First of all, we concentrate on them in battle. We use healers only to restore health, and we send the dwarves forward to control the center of the battlefield and finish off wounded enemies. We talk at the exit with the man and leave the Witch's stone through the portal.
Cold welcome. How to defeat the marauders
We move to the Batil gate, but we will not meet anyone near the castle. We go inside and on the cart we find the key, which we use on the grate on the left. We make our way to the warehouse, collect various items and grab the lever in the back room.
We leave on the street and run to the water mill opposite to get the chest and get a solid reward. We follow to the bridge and use the bell on the right. The gate will go down and marauders will attack Aivar.
This battle will not be the easiest one, so it is advisable to replenish your strength before the battle. We use the same set of troops as in the battle with the elementals, and the first thing we do is send the wolves with the activated ability to return to a small squad of enemies on the right. We move the dogs a little to the side and attack the distant detachment on the left after one turn. We use dwarves in the center to provoke enemy swordsmen to attack. This tactic will help you withstand the battle with minimal losses. It is also recommended to activate the "Living Fire" scroll on archers in the very first turn in order to instantly weaken the enemy's long-range detachment.
After defeating the marauders, we meet with Horace and watch a short video about the past of the protagonist. Now we move along the markers to complete the current task.
First, we talk with Prince Adrian and receive new assignments from him, and then we return to Montier, talk to his assistant and receive a very solid reward. We leave the Throne Room and go to the next location.
A swan song. Where to find Flavius Ostroslov
We move to the left of the stairs and talk to Tweet, who will ask you to find Flavius Ostroslov. We go through the markers and collect all the scrolls. Next to one of the scrolls not far from the aqueduct, we solve a puzzle in which you need to set fire to the statues in the correct sequence:
- Left statue in front.
- Right statue in the back.
- Left statue in the back.
- Front right statue.
Having done everything correctly, we will find a chest on the stele. In the north, behind the outpost, we fight the undead and meet Tillek, who saw something on the field. We move to the marker, fight with a small detachment of evil spirits, lift the letter from the body and return to Tweet.
Priceless chickens. What to do with Cutter
On the marketplace we talk to the merchant Gallin, from whom five expensive chickens were stolen. We go to the nearest mark and find the chicken at the bandit Cutter. We talk about him with centurion Prim and choose what to do next:
- Talk to Magistrate Tweet (increases the level of anarchy). The official will deal with Cutter on his own and offer a reward for the trouble.
- Deal with Cutter and his gang (increases the level of order). Let's stop the atrocities of the bandit in the region.
We take the rest of the birds by markers and return them to the owner.
Feasible help. What is a crutch for?
We activate the task at the blacksmith in the trading area. We take away the crutch next to it and take it to the master of the golems out of town. We insert the crutch and report the successful launch of the press.
Worker-golem. How to start the elevator
Jacquard will ask you to take the tablet to Lita. We go to the girl and get a reward for the work. After completing this quest, the player will have access to an elevator, with which you can bypass a serious battle at the early stage of the game and get into the southwestern part of the map.
House of conspirators. Who to choose in the quest
We follow to Ollagar, go down to the basement of the house and activate the lever, which will open a secret passage. We go down below and fight with skeletons. We examine the note on the table and go out into the street. We decide who to give the letter to, but this will not affect the plot in any way:
- Transfer to Tenebros (increases the level of anarchy). The adept will offer help and tell about the whereabouts of the traitor.
- Pass Horace (increases the level of order). The guard will tell you about the whereabouts of the knight.
A monster from the ruins. What happens if you give the amulet to Dwayne
On the way to the refugee camp we meet Dwayne. We follow the marker and notice the amulet in the ruins. We activate two pressure mechanisms, take away the decoration and get acquainted with the skeleton, which will ask you to return the found little thing. Further actions:
- Conduct an investigation (increases the level of order). We talk with the merchant by the road, get information from Ada and return to the city to Prim. We give the amulet to the skeleton and take several soldiers into the army.
- Give the amulet to Dwayne (increases the level of anarchy). We will receive a small deposit, but the man will deceive the hero and will not give out the remaining amount.
Seeds of Betrayal. How to complete the task
We leave for the refugee camp and talk with their leader. It is necessary to help the residents to solve their food problem. Also, the hero must inquire about the guard Titus. He will meet this man in Rikwil. We talk with Prim and after completing the task "Refugee Camp" we communicate with Norman. Previously, he will refuse to say anything to the hero.
We interrogate Titus and receive important information about the culprit of the disaster. We follow the marker in search of the magician Palatinus. On the way, we meet Ursula and Albert, who will tell you the whereabouts of the sorcerer. This task is closely related to the quest "Mad Genius". In the ruins near the "Goose and Logos" tavern we find a distraught magician. We ask Ursula and Albert about the retort and go in search of the spirit of air Adur.
Refugee camp. Who to choose in the mission
We ask the girl and follow to Kisten. We learn from him about the letter and go to the village of woodcutters, where we talk with Sylvain. We cross the river and destroy the group of trolls. We take away the certificate and give it to one of the characters:
- Give a diploma to Sylvain (increases the level of order). The man will thank the hero for a fair decision.
- Give a diploma to Kisten (increases the level of anarchy). The bandit will take all the land for himself, appoint Guf in charge and drive the sick and children out of the refugee camp.
If you tell the leader of the gang about the letter, but do not give the scroll to him, then you will have to fight with the army of the robber. This fight will require a huge number of allies, so it is not recommended to come to the villain early in the game. At the end of the battle, the enemy will be defeated, and the "Agree with Kisten" task will become inactive. We decide the fate of refugees and make a choice in favor of one of the options:
- Agree with Gerrick (increases the level of order). We'll have to persuade the headman, the blacksmith and the healer to get support from the city. To do this, you will need to complete the quest "The Village Healer". We talk again with three residents of Riquville and get approval for the delivery of humanitarian aid. We communicate with Gerrick and move to the refugee camp, where we meet with Mercia to complete the assignment.
- Agree with Kisten (increases the level of anarchy). The result will be exactly the same as after the transfer of the diploma.
Crazy genius. What to do with the perfume of Palatinus
We meet a couple of aristocrats who are also looking for the magician Palatinus. We follow the marker and talk to the innkeeper. We find the sorcerer and examine the magic cage:
- Destroy spirits from the cage (increases the level of strength). We enter the battle and defeat the enemy.
- Solve the riddle of the Palatinus runes. (increases the level of mastery). We use the rune and activate all the symbols that appear.
We show the guest letter to Palatinus and interrogate the magician.
Country sorceress. Where to find ghost lilies
We talk with the healer and go to the swamps, where we collect four ghostly lilies. We defeat evil spirits on the way and return to the girl.
Brand's bride. How to save Marlene
On the way to Kisten we meet a man who asks to get his bride out of the captivity of the Cleaver. We follow to him and get acquainted with Bonnie, who will ask to release her from the services of the old mistress. We talk with Sekach and make a decision:
- Give de Guyenne an invitation to date (increases the level of mastery). We leave for the city to the girl to transfer the letter, activate the symbol and go through the portal. We return to Bonnie and free Marlene.
- Deal with the Cleaver and his gang (increases the level of strength). We are fighting with a large detachment of the enemy. On the right side, it is recommended to place the strongest unit in order to protect yourself from the raid of riders, and on the left we place wolves or dogs.
Melar's only friend. Who to give the pig to
Near the village of woodcutters, the old man will ask you to find his pig. We talk with Rochus and go to the indicated point on the map. The pig can only be picked up after defeating the trolls. Near the old man's house, the hero can find a note, which indicates that the old man previously sold the pig to Rochus. We return to the village and make a choice:
- Give the pig to Rochus (increases the level of order). The man will thank the hero with several gifts.
- Give the pig to Melar (increases the level of anarchy). The old man will have no money, so the reward will be very small.
The last treasure. Where to find a book of fairy tales
The girl asks to find a book of fairy tales that she lost in a fire. We find this item in the troll cave and return it to Bail.
Marcellus Aqueduct. How to fix a device
In Marcellus, we talk with the official Pitt, who will complain about protracted work on the aqueduct. We follow to the marker and deal with the undead. On the way, we can clear two places from enemies near the city. We talk with the man and move to the cemetery, where we will find the necessary crystal for the operation of the aqueduct.
We talk with the dead and decide what to do:
- Set the crystal by summoning undead (increases the level of strength) . We defeat the undead in battle. It is advisable to put all strong warriors nearby and send them into battle together. We deal with archers and spirits from afar, do not forget to use attack spells.
- Return the stolen Seal of Souls (increases the level of mastery). We talk with the merchant in the city, return the artifact to the cemetery and fight the army of the dead. For the victory we get some rewards and the ability to buy the dead.
The gang is at the old outpost. How to defeat the robbers
Calven will ask you to find his brother, who was at the old outpost. The fortification is already occupied by robbers, so you won't be able to get to it without a fight. Before entering the battle, it is recommended to replenish the army and complete several side quests, since the battle with the enemy will be quite difficult. On the way, we activate the "Die Hard" task.
We will have to fight the villains on a narrow bridge, so we try to leave a free passage for other units. It is necessary to place the most powerful soldiers in front, for example, dwarves and swordsmen. We try to deal with the closest enemies as quickly as possible and weaken both detachments of enemy archers with all our might. After the victory, we free Servan and move to the city to the traitor, where the hero will have to decide the fate of the guard:
- Tell the chief of the guards about Postumus (increases the level of order). The centurion will arrest the guard and Patch. From now on, the robbers will have to purchase from another merchant.
- Talk to Flap on the advice of Postumus (increases the level of anarchy). We will receive several warriors as a reward, but the traitor will not be punished.
Toughie. Who to choose in the mission
Not far from the old outpost, Tiviri and Vincent argue about how best to attack the bandits. We make a decision for them:
- Help Tivir summon the eagles (increases the level of mastery). The girl will call eagles to help fight the bandits. In this case, the hero needs to get the Wonderbird's feather, find the rattle's berry and place the gifts on the animal altar.
- Attack on the advice of Vincent (increases the level of strength). We attack the outpost head-on.
At the end of the assignment, we will receive a reward from one of the travelers we meet. Now you can pick up the bandits' gold from the barrel near the waterfall, the location of which is shown in the screenshot above.
From time immemorial. How to defeat a skeleton
When completing the "Swan Song" task, we come across a talking skull in the north of the location. We talk with him and collect the lost bones by markers. Do not forget to activate the mana source near Arsen. We examine the tombstone and fight the evil spirits.
This fight is going to be pretty difficult. In the first turns, all friendly units will be able to attack only death knights, so it is recommended to take only melee units with you into battle. You can use unnecessary soldiers instead of a target and put them forward so that the archers at first concentrate only on them. We kill the death knights and try to get to the archers with the help of spells and abilities. We end the battle and follow to the point for the reward.
Prodigal son. What to choose in the task
We talk in the tavern near Marcellus with the caught thief. The man will ask you to give him the medallion to his mother. We follow to Rikvil to the north, but its gates will be locked, as the undead attacked the city. We carry out the task "Riquil under siege" and talk alternately with Georges and Cora. We return to the tavern and decide the fate of the thief:
- Give Hugo Cora's wallet (increases the level of anarchy). The man will bribe the guard and be freed.
- Give Georges words to Garlon (increases the level of order). The guard will not release Hugo and will keep him in a cage for a couple of weeks.
For completing the task we will receive a letter that will activate the new quest "Mysterious Treasures". We return to Rikwil and give the wallet back to Kore.
Riquville is under siege. Who to choose in the quest
We follow to the mill, talk to the man and deal with the undead. After saving Georges, we return to the village and decide what to do with the fake guards:
- Calm the peasants (increases the level of mastery). The peasants will allow the guards to stay in the city.
- Arrest Titus and his people (increases the level of strength). We defeat the soldiers in battle and arrest them.
Trappers. How to get a totem
A man cannot train animals, as his magic totem was taken away from him. To help a resident of Riquville, you must choose one of the options:
- Take the artifact from the wolf Lobo (increases the level of strength). We chase a wolf on a horse and select a stick.
- Find a way to convince Aro (increases the level of mastery). The girl will only help after completing the "Millennial Oak" quest. We take away the stick and carry it to the trapper.
If you immediately take the stick away from the wolf, then it will no longer be possible to help the druid, so first we activate the next task "Millennium Oak", open the portal, and then run into the forest for the stick in order to simultaneously increase the level of power and complete another quest.
Millennial oak. How to solve the puzzle
We follow to the tree and solve a simple puzzle. We activate the altar in the center and use the ritual stones in turn:
- Behind the tree.
- To the right of the tree.
- To the left of the tree.
We go into the portal, fight with Doom and return to Arogasta.
Tragedy of the past. How to complete the quest
We meet in Marcellus with Bernard, who will ask the hero to find those responsible for the appearance of the disease in his village. We take away the ratchet and use the artifact in four places marked on the map. We return the item to Bernard and follow to Amanda for the measurement results.
Reckless magicians. How to complete the mission
To get to the bottom of the truth in the story with Parnak, Aktarius can help. We follow to him and talk to the man instead of Amanda. We move to the marker and find a magazine with waste disposal. After examining the document, the hero will be able to follow the trail of Sachs. We find a laboratory assistant, but he will not help in finding the artifact, so we return to Bernard to receive the next task.
Harmful artifact. What to choose in the task
We follow to the marker in the ancient crypts and find a harmful spirit. We return to Bernard and examine the three runestones. We talk with the spirit named Molino and decide what to do with the scroll:
- Trust Molino and return to Bernard (increases the level of anarchy). The hero will believe the word of the spirit and will not destroy the scroll.
- Attempt to destroy the Molino artifact. We fight with the enemy army and destroy the artifact.
We return to Bernard and complete the questline.
Abandoned catacombs. How to solve the puzzle
After successfully completing the "Refugee Camp" quest, another path will open. Philby will talk about the abandoned catacombs in which very powerful artifacts can be hidden. We move from the camp towards the mark and defeat a small squad of animals. We go inside and get acquainted with the ghost of Logras.
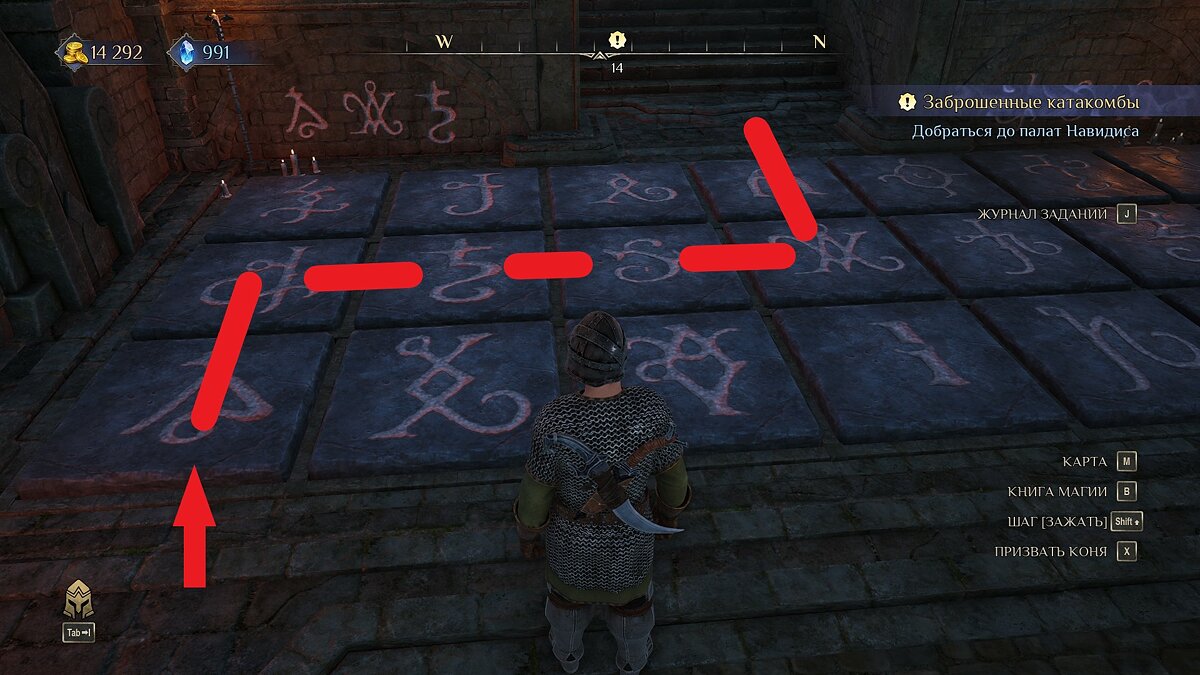
We turn both statues away from ourselves to open the bridge. We pass forward and along the road to a dead end we find two valves. We insert them into free connectors and activate. On the first floor of the laboratory we pass through a hidden passage in the wall and take the key, and then we rise to the second floor. You can go further only on the correct tiles.
The screenshot above shows the correct path. Correct route:
- We go to the far left tile.
- Move forward one tile.
- We pass three tiles to the right.
- We follow forward.
Abandoned catacombs. How to defeat a chimera
We activate the mechanism on the shelf next to Logras and talk to him. We go downstairs, take away the cauldron in the room next to the spirit, pick up the chicken meat in the dungeon to the left of it and unlock the door. Near the stones, we talk with the spirit again and decide what to do with the chimera:
- Defeat the Chimera (increases the level of strength). We pass through the portal and fight with the creature. The battle will not be difficult if the player has a large army.
- Find a way to distract the Chimera (increases the level of mastery). For the broth, you will need the previously found cauldron, chicken meat and the Marcellus reaper. We take away the broth, return to the spirit and we pass through the portal. We leave the boiler and continue on our way without a fight.
We take away the vessel with the heart, we leave through the portal into the catacombs and talk with Lorax, who will become a man again.
More than expected. How to make silver bowls
Enchantress Ermia wants to incarnate the silver bowls that were previously stolen. To perform the ritual, the girl needs a silver bracelet, which the merchant Illem has:
- Buy a silver bracelet (increases order level).
- Steal a silver bracelet (increases the level of anarchy).
We return with the decoration to Ermia. Find the magic ball and follow the marker to collect water saturated with mana. We return to the young magician and get a reward.

Comments
Post a Comment