As in the predecessor, you can also discover 2 safes in Dying Light, which contain rare resources and more. We reveal where you can find the safes and what combinations you need to open them.
What are safes? You can find the small lockers scattered throughout the world of Dying Light 2. In them, you will discover useful and rare items such as inhibitors to increase life points and stamina and thus improve your skills or even powerful throwing weapons such as grenades.
You can discover most of the safes with a small detour during a quest. Some are simply hidden in buildings. In order to open it, however, you first need a corresponding code.
Where can I find the safes? There are several locations on the map where safes are located in both Old Villedor and the Central Loop. You can always find them in houses, usually quite obviously on desks, but then they are a little apart.
All locations can be found on the map here:
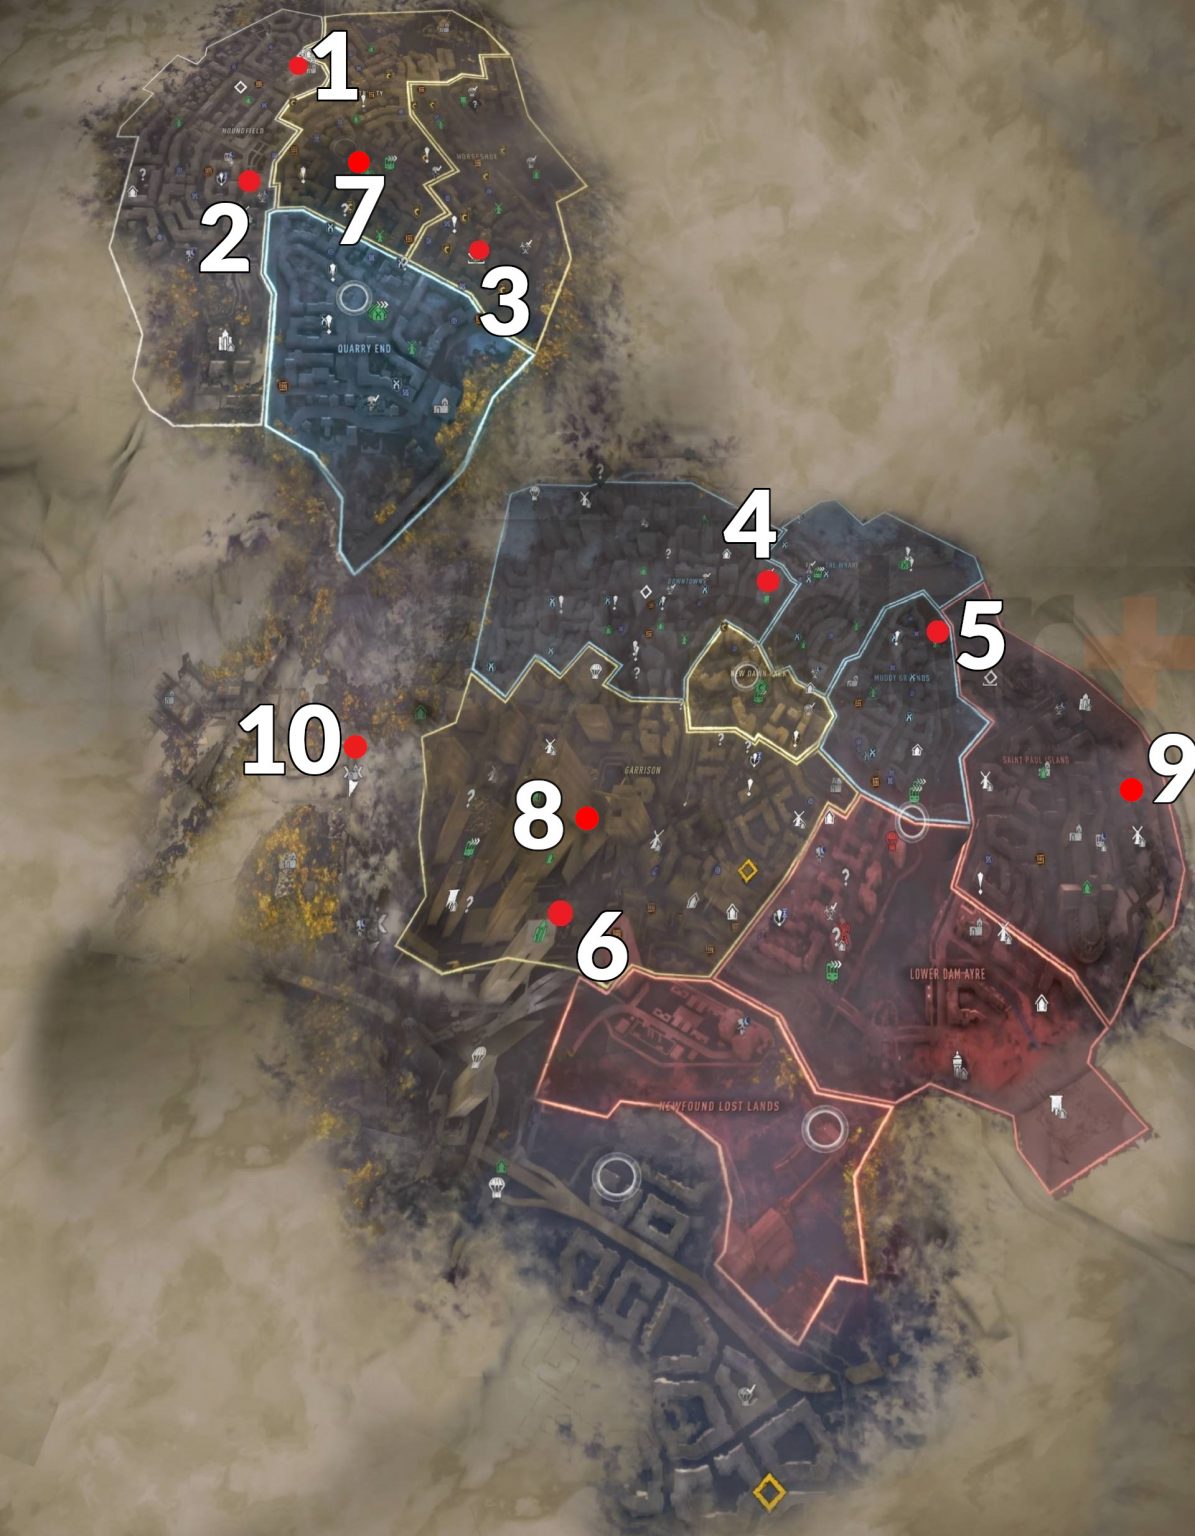 |
| All locations of the safes. |
Keep in mind that you usually have to go to one of the houses shown. If you don't find what you're looking for right away, use your survival skills and look for nearby containers. The entrances are not always on the street, but can also be on roofs or you have to enter through windows.
List of all combinations for the safes in Dying Light 2
How do I find the codes? If you want to solve the puzzle yourself, you will usually find clues to the combinations nearby. Talk to NPCs or look closely at your surroundings and you'll usually find clues or even the codes directly. Alternatively, you can open the spoiler here and find the codes for every safe known so far:
- Safe 1: North Houndfield in Saint Joseph Hospital during The First Biomarker - 9-7-3
- Safe 2: To the east of Houndfield in a Nightrunner hideout - 1-0-1
- Safe 3: In the south of Horseshoe in the water tower behind a locked door - 14-9-2
- Safe 4: To the east of Downtown, behind a window with yellow pillars in the building - 313
- Safe 5: North of Muddy Grounds in the basement of the Water Tower during The Deserter/Treasure Hunt - 31-21-67
- Safe 6: In southern Garrison in a sealed building called Section C during "Transmission" - 3-1-4
- Safe 7: South of the center of Trinity, in the Bazaar Clock Tower (requires some climbing) - 5-1-0
- Safe 8: In the center of Garrison on top of the VNC Tower – 6-6-6 (but feel free to try 5-5-5)
- Safe 9: To the east of Siant Paul Island, in the tower of the Church of St Thomas the Apostle – 4-4-4.
- Safe 10: East of Garrison, out of the area, on an old bus by the causeway - 9-6-6.
- Safe 11: In Crocodile Flats in Houndfield during the quest "A size too big" - 11-11-19 (location will be added later on the map.
Comments
Post a Comment