A detailed walkthrough of Dying Light 2 Stay Human: we tell you how to complete all the story missions and get the best ending in the game
In Dying Light 2 Stay Human, you will have to fight through crowds of the infected, run on the roofs of buildings and make ambiguous decisions. If you are an inexperienced player, we recommend that you start the passage of the story on an easy difficulty level.
Pilgrim's Way
We climb the rock and follow Spike until we get to the beehive. Spike suggests collecting some honey and chamomile flowers. In the future, with the help of these resources, we can make first-aid kits. To simplify the search, press the key shown on the screen and activate Survivor Sense.
In addition to the resources required by the assignment, we can inspect the forest and find additional honey and chamomile. When we are ready, we return to Spike and follow the abandoned house. We climb into the building through the ajar garage door and inspect it with the help of flair.
We search lockers and briefcases. In the kitchen, we find a collectible item "Newspaper Article - October 11, 2020". On the street, we examine the corpses and read a letter from one of the owners of the institution. We get a collectible item "Farewell letter" .
We rise to the second floor, we talk with Spike. After the dialogue, the task will be updated. We run towards the antenna, inspect the houses and, if necessary, deal with the zombies. Having reached the destroyed bridge, we use the overturned bus to climb up.

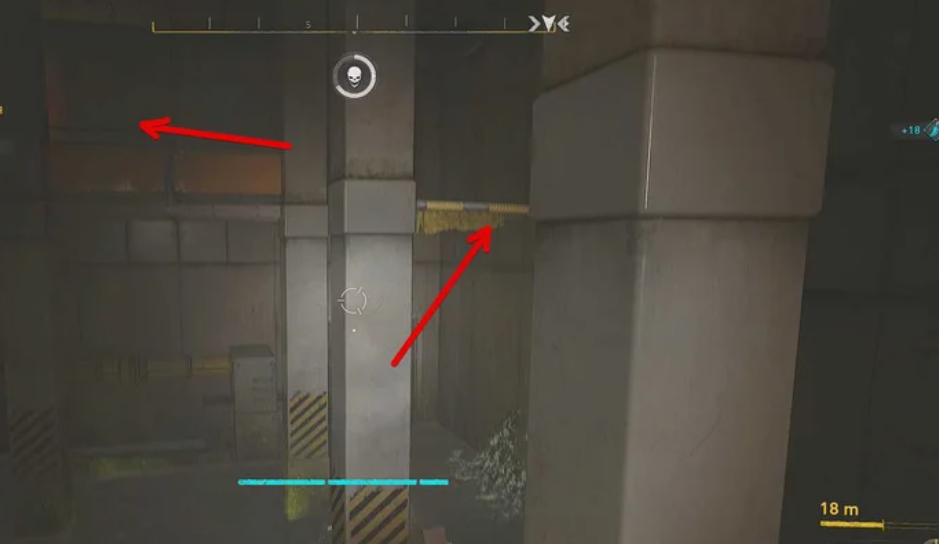
In the tunnel, we see the sleeping dead, who have many useful things. We can leave them and leave, or use a gas cylinder and blow up most of them. To do this, take a gas cylinder at the exit of the tunnel, lure a crowd of the dead to you and hold down the "X" button. Throw the balloon towards the crowd.
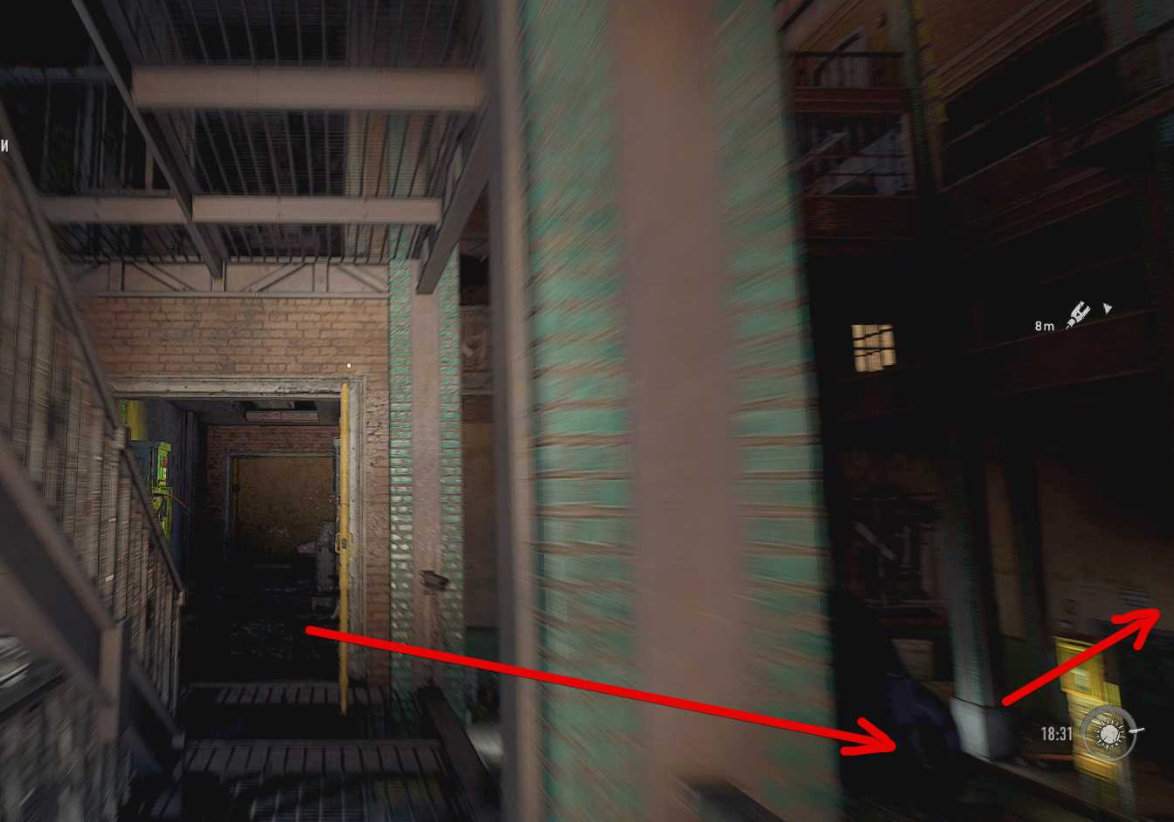
We continue to climb the rock until we reach the building. We use the drainpipe at the end of the building and go up to the second floor. We move the cabinet, we find a room with a radio station.
We get out through the window, we find a garage with a generator. When we try to open it, zombies will attack. One of the biters will jump on us from above, using powerful attacks. Such attacks cannot be blocked, but they can be dodged. Hold the back or side button and press the spacebar once.
We start the generator and wait until the morning. In the morning we contact the informant, at the radio station we select "140.200 MHz".
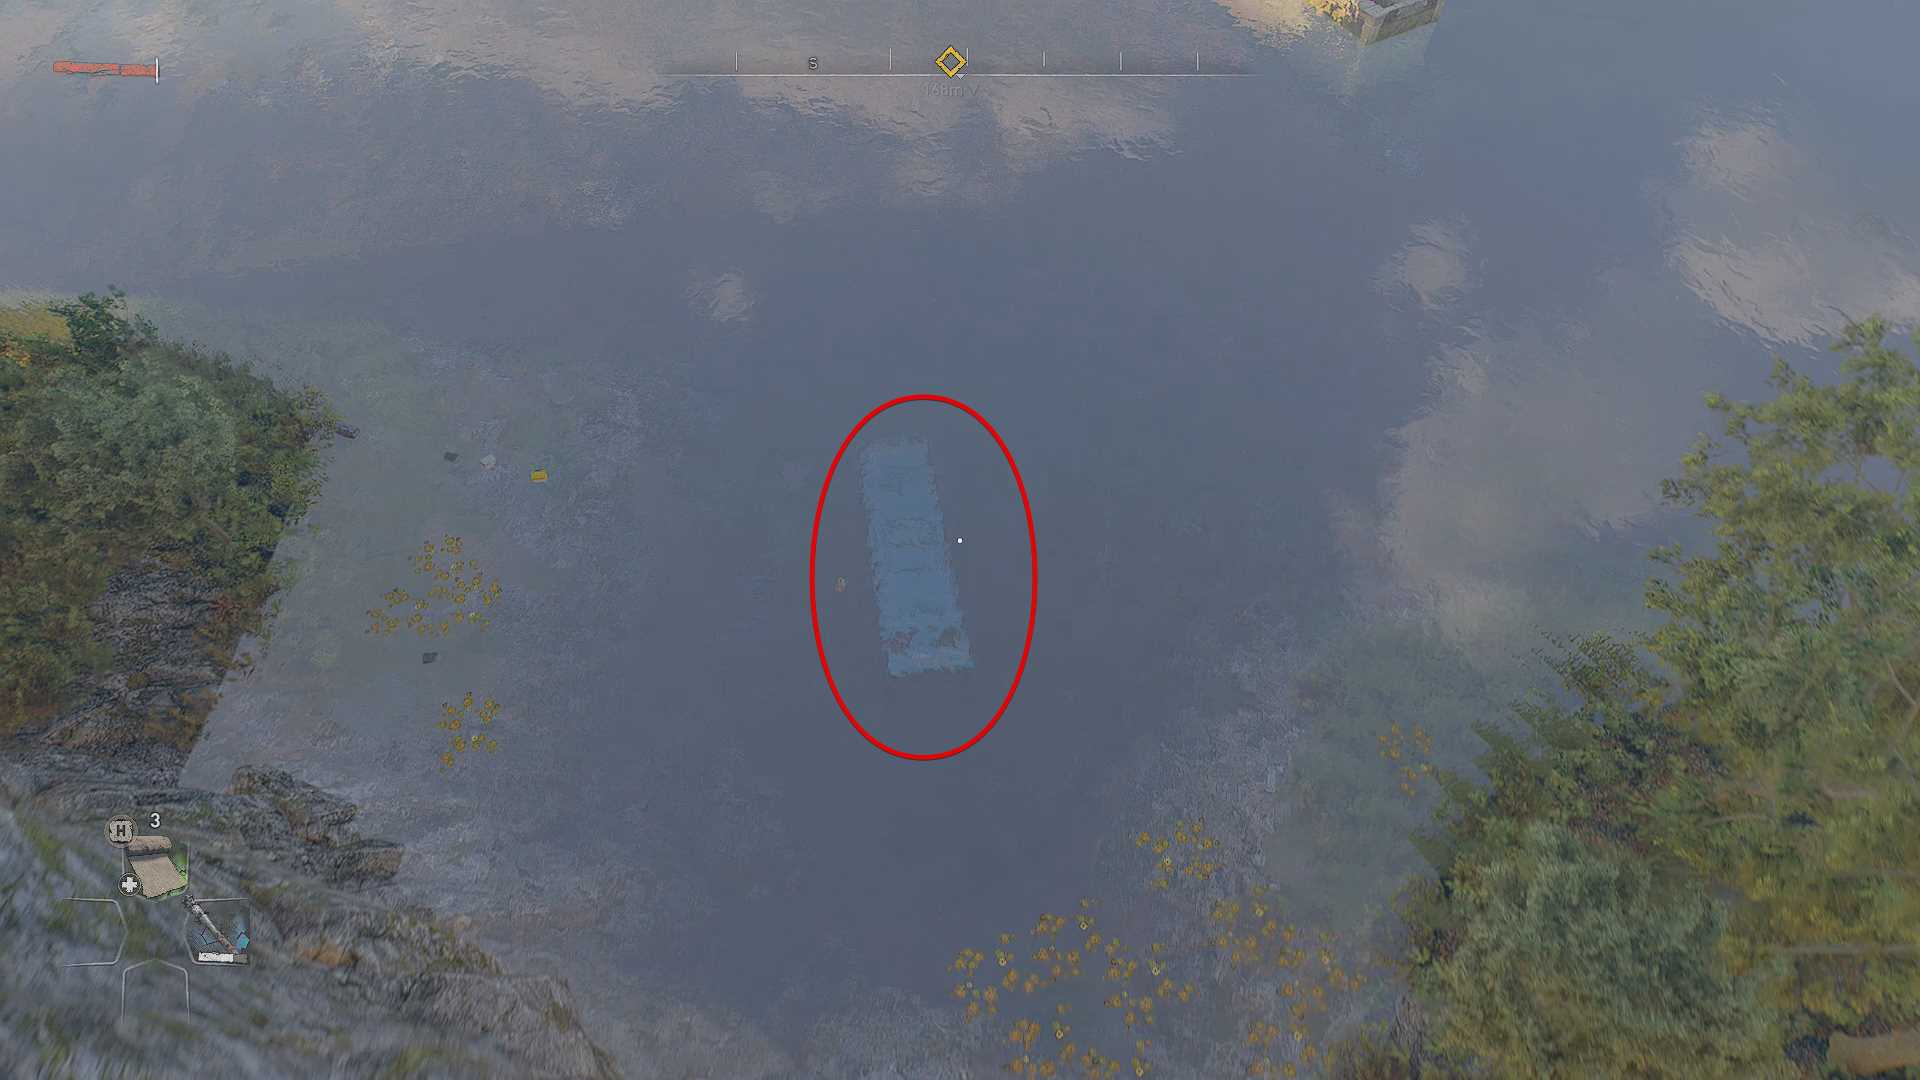
We set off for the marker, on the way we explore houses and cars. In the church, right after the antenna, we find a collectible item "Paradise Lost, Book IV". We swim across the river. On the bus underwater, we can find resources and valuable items.
We get to the subway tunnel and watch the cut-scene with the messenger. We break the wooden box and find a man. We fight with two groups of renegades, pick up valuables, and communicate with a liaison. He gives us the VGM key and asks to take it to a certain Loan in the Fisheye bar. We watch another video, then we run away from Waltz through the subway tunnels. Having reached the bazaar, we watch the cut-scene and get acquainted with Hakon.
Get stronger
After waking up, we examine the room of Sarah and Yana. We find a collectible item "Playing card of the infected - Ace of Spades - Destroyer". We can chat with the girls and Hakon. Having reached the grove on the roof, we examine it and find valuable items. To continue the passage, open the box and pick up the crystal. We follow Hakon to the army cargo and open it with the VGM key. Hakon will ask where we got the key from:
- From the VGM scientist - trust Hakon.
- It's better for you not to know - not to trust Hakon.
We run after Hakon to the market, then to his friend Killian. We fight off biters until Killian turns on the lamps. Answering Killian's question:
- Aiden, he's a pilgrim - trust Killian (best choice).
- Let us in first - don't trust Killian.
We examine Killian's shelter: we find a weapon, we communicate with a man, and go to bed.
Plague markers
Waking up, we get to the hospital. To the left of the main entrance is a bus that takes you into the building.
We follow Hakon, break open the door, and get to the crowd of the dead. We can get around them or kill them (the second option will bring combat experience and a lot of useful resources). We jump into the elevator shaft, fall through to the lower level. It is not recommended to fight zombies here, as a strong infected can hear us. Use the tables to sneak around the zombies.
We get to Hakon, we get a biomarker. We run to the exit, watch the cut-scene with the infected, and communicate with Hakon. We get binoculars, with which you can open new objects in the city. To do this, move the binoculars until a mark appears in the center of the screen. The closer the place that can be found, the smaller it is.
The only way out
We go to the market, get acquainted with the inhabitants. While waiting for a message from Hakon, you need to complete two additional quests "Spark of Discovery" and "Let's raise our glasses!". You can check out the quests here. When meeting residents, we always communicate with Carlos (apprentice mechanic), Lena, a bartender named Urban, and Ahab (a man in tattoos).
We receive a message from Hakon, we meet with him. We are waiting for the night, we go to the entrance to the subway tunnels. To open the hatch, kill all the zombies. We try not to use gas cylinders and other explosives, as this will attract more infected.
In the subway tunnels, we go around the dead and collect useful items. Here we meet a new type of infected - spitters. They are only dangerous from a distance, but killing them up close is pretty easy. We use the ventilation shaft and get to the metro station. Interact with the button to activate the gateway, watch the cut-scene.
We communicate with the leader of the peacekeepers, after which we can inspect the main railway terminal. Here we talk with a courier and two patrolmen. At the exit from the station, we listen to the dialogue between Karl and Anderson. We leave the camp of peacekeepers, we find Hakon. He suggests finding a merchant named Hubie. The merchant may know who stole the brass knuckles.
We get to the windmill "Oak", we communicate with Benny. At this point, Hubie will start running away from us. You need to catch up with him in the allotted time. We follow the roofs of houses and find the VGM building. Hubie is waiting for us at the entrance on the roof of this building.
Hubie will tell you that a girl named Maya tried to sell brass knuckles to him. In fact, this is a girl who found brass knuckles near a corpse. For them, she asks five hundred. If we choose "Harley", then we get brass knuckles almost for free. We examine the building in which Maya lives and find useful items: inhibitors and a collectible item "Lullaby".
We return to Aitor, give him brass knuckles. He wants us to find Lucas' killer. It is best to start the investigation from the bazaar. We get to the side entrance and watch the cut-scene with the leader of the survivors - Karl. Then we communicate with his sister Sophie. She asks to speak with the masters about the crystals. Alberto will tell you that Sophie's younger brother has already gone for the crystals. A new additional task becomes available, which should be completed at night.
obstinate brother
We get to the store marked on the map. Inside we find several crystals and the corpse of a man. We pick up the radio, go up to the second floor. We kill the zombie that knocks on the door and communicates with Barney.
Regardless of your answers, Barney will refuse to open the door. We kill several more infected, break open the door, and communicate with the guy. He asks to find the boy who helped take the bulk of the infected away from the store. We use our intuition and follow the bloody trail to the neighboring building. The boy lies on the floor on the third floor. Nearby we find a box with an inhibitor. We return to the market, eavesdrop on the conversation between Veronica and Barney. We talk with Sophie and complete the quest.
Arrival
Sophie asks you to follow the negotiations between her people and the bandits. If you do not go to the meeting immediately, then we will receive a message on the radio that Sophie's people were attacked and all resources were taken away. We examine the place marked on the map, kill the bandits, and communicate with Susie. At this point, a crowd of zombies will appear, led by a strong infected. We kill everyone, inspect the corpses.
Plaque
We leave for a meeting with Sophie. First, we communicate with Herman, then we go to rest. After talking with Sophie, Aitor contacts us by radio. We communicate with him and return to the camp of the Survivors.
Sophie wants us to take over the bandit camp in the east of the city. To do this, you need to kill all the bandits, the leader of the camp, and assign the camp totem. The totem is always located in the central part of the camp.
During the raid, try to kill the bandits who raise the alarm first. They are indicated by a special horn icon.
Before assigning a totem, be sure to collect all the loot in the camp. This applies not only to camps but also to water towers and power plants that you will encounter in the future.
On the roof of the camp, we can find an army cargo with valuable resources, and when inspecting the camp, we will find a collectible item "Playing the card of the infected - Ace of Hearts - Jumper".
We communicate with Karl and go to the Tango motel. Before entering, Hakon will contact us and ask us to return to the subway to Aitor. If we choose "I'll go meet Sophia", then we will continue along the path of the Survivors.
Path of the Survivors
We find the walkie-talkie of the deceased peacekeeper, we answer Aitor. At that moment, Benny appears and orders his men to kill us. We deal with them, then we fight with Herman. It is difficult to dodge the blows of the thug, so we use throwable items such as Molotov cocktails and mines to quickly kill him.
After the battle, Hakon will drop a ladder to the roof for us. We return to the hotel, find a room with bars, and communicate with Sophie. In the same room, we find a box with an inhibitor. If we answer Sophie "You can try ... but", then she will not shoot. We go to Aitor at the metro station and report on what happened at the hotel.
Water tower
Aitor shares with us information about the bandits who have settled in the water tower and are going to blow it up. He wants us to defuse the explosives and take over the building.
We leave for the building of the water tower, we find three charges. We try not to use weapons on gas cylinders, as they can explode. On the top level of the tower, not far from the UV lamps, we find a box with an inhibitor.
We climb onto the roof, interact with the closed window, and communicate with the bandits. Here you have to make a choice:
- I will help you - perhaps we can negotiate with the bandits (later we will update the outcome with a decision).
- I will not help you - we chose this option and killed the bandits.
In the room, we find the collectible "Vellidor Tour Bureau - Horseshoe" and interact with the valve. We need to choose who gets the water. In the selection menu, you can track what bonuses this or that faction will bring.
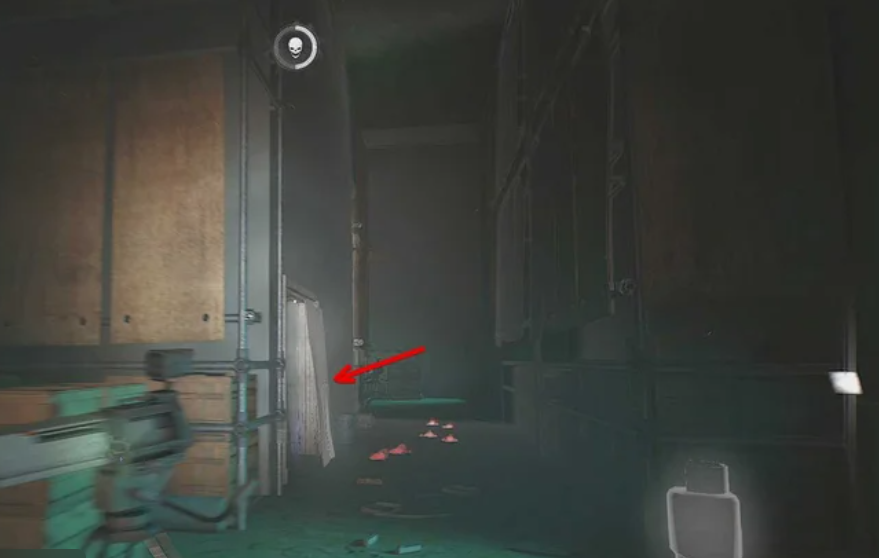
Before dying, the gangsters will tell that Lucas wanted to arrest Barney, so he becomes the prime suspect. We return to the hotel and open the room with bars. On the right side of the room, interact with a wooden sheet, move it aside and on the floor, we find a piece of human skin with a tattoo.
We talk with Barney and fight with him. At some point, Sophie will show up and assume that someone is trying to set them up. To complete the task, we return to the market and watch the cut-scene with Carl.
Revolution
We talk with Alberto, who instructs us to return the bandits' explosives. We follow to the water tower, communicate with the survivor, and find out where the messengers with the bombs went. We get to the marketplace, kill all the infected and ask the messenger about the explosives. He will say that the charges are in the boxes on the street. At the same moment, several strong infected will attack us. It is not necessary to kill them at all: these zombies are slower than others, so quickly inspect all the boxes and find explosives. Regardless of the sequence in which you open the boxes, the charges will be in the last two containers.
We return to the market and give the explosives to Alberto. Since one charge is gone, you will have to find resources to create a new one. We go to Killian's hideout, open a simple lock and find the ingredients in the locker. We take Alberto's resources and get three bombs. In Alberto's hideout, next to the windmill, we find a box with an inhibitor.
We run to the windmill and penetrate the territory with the help of fallen iron pipes to the left of the entrance. We climb onto the gazebo, then follow the yellow marks. We install three explosives and return to Alberto.

Alberto will detonate the charges, but this will not bring the desired effect. We ask the mechanic to build another bomb, now with clockwork. When Alberto stumbles, we can complete it:
- For a generator?
- Throw her in the river?
- To the very center of the windmill? is the correct answer.
- At the base of the windmill?
Since part of the fence in front of the windmill is destroyed, we climb onto the upper part of the structure and wait for the rotation of the blades. We use the boards on the windmill blades three times to climb higher.

We plant the bomb and watch the cut-scene, after which we return to Alberto. Peacekeepers attacked the old man - we fight back and communicate with the mechanic. He asks us to convey the last message to his son Vincenzo. We agree, and when Hakon contacts us, we answer him:
- I will do what Alberto promised - help the survivors recapture the bazaar.
- I will go to the center - this will change the path of passage.
We go to the market. We kill several peacekeepers, release the prisoners on the first and second floors. At that moment, Sergeant Anderson appears with several subordinates. We deal with it and find Vincenzo at the gate. We give him a message from his father, after which we go to Hakon's shelter.
Arriving at the place, we watch the cut-scene with Hakon and the sniper. We also find out a few details of the murder of Lucas. When the sniper shoots Hakon, choose:
- Leave Hakon to die.
- Help Hakon - to get the best ending, the guy is needed alive.
sniper alley
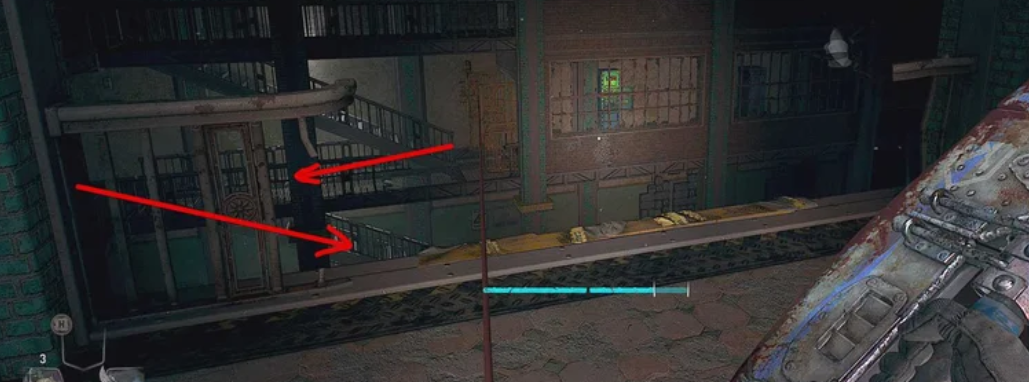
This quest is a side quest, but it must be completed if you chose the "Help Hakon" option. We get out of the shelter of a friend and use binoculars to find a sniper. It is located on the roof of the opposite building, between scaffolding.
We go down and move behind shelters to the gate. The sniper blows up the barrels at the gate, so we go around the gate on the right along the water and use the yellow pipes to climb into the territory of the plant. We rise to the roof of a distant building. At this point, the sniper will drop the ladder and we will have to start all over again. We climb onto the roof of the building along with the metal structures and find a sniper.
flaring
We leave for the marker on the map, we find the entrance to the tunnel. The gate is locked, you have to go around the rocks and get inside. At the end of the tunnel, we are trying to activate the gate, but there is no electricity. We activate the first generator opposite the exit, then we run to the entrance and activate the second generator. Before that, we have to fight a new type of infection - a runner. This zombie doesn't know how to fight, he will take overdrive and try to ram you. We dodge his attacks in time and kill the dead man.
Having dealt with the infected, we activate the generator and meet with Aitor. The peacekeeper is unhappy with our choice and wants to execute Aiden. But since the light went out, he asks to restore the power. There are three doors on the left side of the tunnel. The central door is open. We penetrate the warehouse, then move along the ventilation shaft and find the disconnected wire. We restore power, return to Aitor and watch the cut-scene with Waltz.
Waking up, we fight back the renegades. At some point, Aiden will mutate and start fighting with his hands. We follow to the automobile plant, we rise to the second floor with the help of lamps, and find Waltz.

We watch the cut-scene, then we leave the building and run through the tunnels for Loan. We try not to stop, as the mutated Waltz is chasing after him. We communicate with the girl and get to the central part of the city.
The place that I will call home
We rise to the roof, watch the cut-scene. At this point, we will gain access to a paraglider, with which we can fly from building to building. During the flight, pay attention to endurance. When the stamina bar runs out, the hero will lose control and fall to the ground. While paragliding, don't forget to use ventilation to climb higher and restore your stamina bar.
Loan asks you to go to the Downtown Power Plant, start it up and create a safe zone. We follow the marker on the map, get to the power plant, and communicate with the peacekeepers. After the dialogue, several renegades will attack us. We kill them, use the metal structure to the left of the entrance and make our way into the building.

Now we need to restore power to the power plant. To do this, you need to connect six transmitters in pairs, each device is connected to a transmitter with the same number:
- The first pair is on the first floor, next to the generator.
- The second pair is on the second floor. To connect the cable, you will have to use a cable.
- The third active transmitter is in the basement. We take the cable, go up to the first floor along the elevator shaft and activate the red transmitter on the first floor.

We rise to the control room using the elevator, find a box with an inhibitor here and start the substation. After activating the power plant, all the loot will disappear, so first, we carefully inspect the building.
After we go to the Fisheye bar in any way. It is not necessary to follow the plot, first, we can explore objects of interest, profit from valuable items and inhibitors. When we are ready, we get to the bar and communicate with Loan's friends. During a conversation with Frank, we will be able to choose whether to put pressure on him or take the girl away. If we put pressure on Frank, we'll get some useful information.
The task will be updated later. The renegades will surround the bar and start firing cannons at the establishment. You need to get to each of the three guns in the allotted time, kill the enemies and neutralize the charges. Hurry, because after the timer expires, the mission will fail.
We return to Loan, watch the cut-scene with Jack Matt. In a conversation with a peacemaker, we answer:
- I came from behind the walls - Matt will trust Aiden more.
- It's a big city, it's easy to get lost in it - Matt knows Aiden isn't from here.
In the continuation of the conversation, Matt will ask what happened to Aitor. The answer will not affect the plot if we kill the peacekeeper in the additional task "Aitor". If Aitor is saved, he will tell you that Aiden blew up the windmill.
Orders
The leader of the peacekeepers instructs us to deliver the order for the redeployment of his people. We deliver orders to the outpost of peacekeepers, watch the cut-scene with the survivors. We leave the area, first, we save one military man, then we help the peacekeepers in the skyscraper. We communicate with Lieutenant Rowe, to find out information about the VGM object. Here we find a box with an inhibitor.
As soon as we leave this area, a distress signal will begin to arrive from Calvet Island. At this point, the side quest "Renegades" will become available. If we help the survivors deal with the renegades and save the prisoners, then we can count on the help of the healer in the additional task "Aitor".
Observatory
Rowe will tell us that the secret base of the VGM was located on the site of the observatory. We get to the observatory, examine the chemical ruins, and then faint. When we wake up, the task will be completed.
Welcome aboard
It's time to get to know the peacekeepers better. We go to the ship, which is moored in the harbor, and communicate with Meyer. After the dialogue, Matt will appear along with Aitor. The latter is in critical condition. If we complete the additional quest "Aitor", we can help the peacemaker or kill him.
In any case, we rise to the bridge and talk to Jack. He offers Aiden help in finding the VGM scientist, but only after the main character restores communication between the settlements using the TV tower.
We go down to Meyer, pick up the UV flashlight, and go to the supply headquarters. The guard and the secretary refuse to say where the leader of the supplies is now, so we communicate with Loan by radio and find out.
Juan is relaxing at the Fisheye Bar. We can visit him and talk. When he asks a question, choose any two answers. Aiden's decisions now will not affect the plot in any way, and Juan will refuse to help the hero. To appease and talk to the leader of the suppliers, Loan offers to sneak into the apartment of an art collector and look for paintings. We follow the marker on the map, go up to the roof, and with the help of a paraglider, we go down to the lower floor. It is now impossible to get into the apartment from the roof.
On the ground floor, we find a collectible "Be fruitful and multiply". One floor above, we examine the letter to Jessica, the list of paintings, and listen to the voice message on the phone. Apparently, the collector was going to fly away by helicopter. We need to inspect the roof.
We break open the front door, go out to the roof. On the opposite side of the helipad, we find the corpse of the collector. We pick up alcohol and return to the ship of peacekeepers. We give whiskey to Juan, after which he agrees to help.
Juan tries his best to convince Aiden not to help Matt. In the plot fork, we make a decision:
- I can help you - Juan's way (quest "Cathedral").
- I'll Help Matt - Matt's Way (Lost Light quest).
If we want to complete the second part of the task, then first we follow the Fisheye bar and hand over a bottle of vodka to the birthday boy. The loan will offer Aiden a drink. If you refuse, then the girl will be upset.
Lost Light (The Way of Jack Matt)
We follow the marker on the map and find the building in which the missing squad barricaded itself. We kill all the zombies in the area, and when we try to enter the building, a strong infected one will appear - "Bar Baba". This zombie only uses strong attacks, so don't try to block them. We find throwing spears scattered around the area and throw them at the boss. If there are Molotov cocktails, grenades, or mines in the inventory, they can also be used. We warn you that explosions will certainly attract infected people from other streets.
We deal with the boss, go into the building, and communicate with Desmoulins. He talks about the second squad that managed to find a military cargo with UV lamps. We check the map, we go in search of a detachment. Along the way we meet several groups of renegades, kill them and find a messenger. One of the expedition members is wounded, we help him and climb onto the roof of one of the twin towers.
First, we go into the building, we move along the corridor to the elevator. In the elevator shaft, we rise higher, then through the gap in the wall, we move to the next building. So we are on the roof. We inspect the container with UV lamps, pick up valuable items. During the cutscene, one of the Infected will drop a military container from the roof. We get out of the container, kill a strong infected and inspect the second military cargo.
Before leaving the roof, we inspect it and find a box with an inhibitor. We inform Demoulin about the find and return to Juan on the ship. After talking to Matt on the radio, the quest will end.
Cathedral (Way of Juan)
In this task, we need to get into the red zone in the east of the city and get to the cathedral. Having done this, we go down to the lower level and meet with the boss. It is impossible to block the blows of the infected, we dodge in time and kill the enemy.
We get acquainted with Kurt, then we turn off the generators nearby. To find the generators, follow the wires. When we turn off the latter, Kurt will offer to join him on top of the cathedral in order to find the device Juan needs. It is located at the top of the north tower. We talk with the mechanic, then return to Juan and complete the quest.
Broadcasting
On assignment, we need to wait a bit until Jack contacts us. The meeting will take place at the Fisheye Bar, so we can go there immediately after talking with Juan. We communicate with Wierzbowski, go up to the VIP room, and listen to Matt's plan.
After the conversation, Loan will ask you not to agree to the peacekeepers' operation to storm the TV tower, but the first talk with Frank. If we agree, we will learn about the exploding infected. Otherwise, such enemies will come as a surprise to Aiden.
On the way to the tower, Rowe gets in touch and reports that the nearest power plant has been turned off. We need to solve this problem. We reach the station, kill all the renegades and climb into the building.
We recall how quite recently electricity was restored in the Business Center. It's pretty much the same here, just a little different. Now each active transmitter can be associated not with one device, but with two.
- At the entrance, we connect the cable from the active transmitter "AB" to module "A", open the first grate.
- Again we interact with the active transmitter "AB" and connect the cable to the module "B", then open the second lattice.
We rise to the second floor, we find the active transmitter "1C". We connect a cable to it, go back, and climb along the railing to the opposite side, to the floor above.
We activate module "C" and open the door with the same inscription.

In this room, we open the safe (hint - the approximate number "Pi"). We enter 3-1-4 and take the inhibitor. Now we have access to the active transmitter "2". We connect the wire from the active transmitter "1C" to module "1" on the ground floor next to the generator. We pull another cable from the active transmitter "2" to module "2" in the basement.

We use the ventilation shaft and wooden boxes on the water to get out of the basement and activate the power plant in the control room. Before the activation itself, renegades will attack Aiden. We kill them, collect useful items.
We leave for the tower, communicate with the lieutenant, and watch the cut-scene. We need to go up to the top floor, go through the assembly hall past the zombies and get into the lobby. Here we see the infected, who blocked the approach to the door. We kill everyone, open the door, and communicate with a seriously wounded peacekeeper. We can take the additional task "Last Will" if we agree to transfer the letter to his wife.
We go down to the basement, we meet the mutated Chris. We save him from torment, restore nutrition. In the next room, we check three fuses, killing zombies along the way. Together with the usual infected, Aiden will be attacked by "flyers". It is impossible to block the attacks of these zombies, we use evasions.
We get to the active transmitter "A" and connect the cable, go to the stairs, and then jump down. So the cable is enough to power the module on the lower floor.
We open the door to the basement, we see the active transmitter "B". Now it is useless to connect a cable to it since you will not have enough cable length to activate the module. We dive into the water, swim on the left side, then turn right and open the double door. We return to the transmitter "B", we pull the cable through the open door to the module.
We sit in the elevator, select the floor "Outpost of peacekeepers". We communicate with Rowe and the soldiers, we go to bed. When we wake up, we find Jack and sit in the elevator. A new type of infected will attack the squad. These zombies explode when approaching the hero. We try to stay away from them or use weapons with high damage to kill them. Two blows of a homemade ax or ax are usually enough.
We clean the floor, inspect the corpses of peacekeepers. We find a utility room in the center of the room, move the leaf of the tree, and talk to Rowe. Loan contacts us later. We continue to fight off the monsters until Frank gets in touch.
He will advise you to inspect the elevator shaft and find a grappling hook. With the help of a hook, we can cling to walls, lamps, and other objects in order to overcome various obstacles. We use the hook on the lamp, we get to the breach in the wall. In the main hall, we climb onto the roof of the utility room. If we open the box with a heavy lock, we will get the Falconer's Shields item of clothing. We continue to follow forward until we get to the next tower.
We climb onto the roof of the tower, on the last floor we examine the box with the inhibitor. We interact with the crane control panel and again move to the main tower.
In one of the rooms we kill a crowd of infected, then we go out to the balcony and climb higher. We cling to the ledges, then we use the hook on the lamps. We continue to climb until we find ourselves on a metal parapet. We overcome obstacles with the help of a hook, we get to the solar panels. On the right side of the location, we find a place where you can climb. After that, use the hook as follows: cling to the wall on the right and move to the left side.
We climb onto the rotational antenna on the right and interact with the transmitter. Frank will offer to hand over control of the radio station to the survivors. Choose:
- Transferring control of the transmitter to Jack Matt is the path of peacekeepers.
- Transferring control of the transmitters to Frank is the way of the survivors.
After choosing, the task will end, and we will meet with Loan and get a new quest.
Horseshoe
We follow Loan to the tower nearby, open the elevator and go down to the lower floor. We break open the door with the number "216", climb the stairs and find a barricaded passage. We use the hole under the table, examine the photo on the door. The box needed for the quest is under Loan's bed, open it and pick up the shoes. In the same room, we find a box with an inhibitor.
The girl went to the roof of a building in the city center. The same building you were in for the first time when you got here. We go upstairs, collect the collectible, and communicate with Loan. In a conversation, choose:
- Hey, what's going on? [Be empathetic] - Loan doesn't like snot.
- Come on, forget it [Be pragmatic].
After that, we select a few more answers that do not affect the plot. The next morning, the Loan will leave, and the task will be completed.
Night Runners (Path of the Survivors)
Frank instructs us to activate several antennas in order to restore contact with the rest of the survivors. Use the ledges in the walls and other objects to climb to the top. When we are inside, Hakon will meet us. We fight with him, and in the dialogue, we can choose whether to forgive him or kill him. We can also dissuade Loan from killing him. If we do this, we will open access to another ending.
To complete the quest, return to the Fisheye Bar and watch the cut-scene. After talking with Loan, the task will end.
Empire (Path of the Peacekeepers)
If we give the radio station to Matt, then we will follow the path of the peacekeepers. This will lead to some irreversible consequences.
We communicate with Matt, go to the North loop radio tower, and launch it. To climb to the roof, you will have to use the parapets and the hook. On the roof, we can open a safe zone if we activate the generator.
We receive another message from Jack. The renegades have destroyed an antenna in the city and are now about to blow up another one. We need to have time to get to the antenna and stop them. A marker with a timer will appear on the screen. We get to the right place in 2 minutes, deal with the enemies and neutralize the gun.
Matt will contact Aiden again and say that the last antenna remains to be turned on. As soon as we do this, Jack will get in touch. We can help him compose a text for a new message to all survivors, or put pressure on him and remind him about Dr. VGM. After the dialogue, several groups of renegades will attack the second antenna. This time you need to neutralize three mortars in the allotted time.
When we do this, Jack will ask you to return to the ship for information. One of the recruits told me where the VGM scientist might be. So we get a new plot task.
Veronica
We return to Old Vellidor and communicate with Barney at the bazaar. The guy will tell you that Veronica and Vincenzo are hiding somewhere on the outskirts of the city. We follow the marker, find the entrance to the building and kill all the renegades. We open the locked room with the help of a master key, we communicate with the wounded Vincenzo. On the table, by the cash registers, we find the collectible "Gambit with the Doctor".
When we try to leave the building, Matt will contact us and ask us to join him. The storyline will open:
- Help Loan and Matt attack the colonel - we skip the research of the laboratory and immediately go to the dam.
- Find Dr. Ryan - Explore the lab with Veronica.
We go to the observatory, where we have already been before. We find Veronica in a small room behind the dam and communicate with her. We can trust her and tell him about Mia (this will not affect the plot). Veronica will inject Aiden with a special drug that will temporarily protect him from chemicals. During this time, you need to get to the first dome and climb up. If we do not have time, we will have to replay the mission.
At the top of the second dome we find a hatch, climb into the building. In the corridor, we see a crowd of infected. If Aiden has the ability to "Running through the crowd", then we can use it and ram the zombies on the run. There is not much point in fighting them, as there are too many infected.
We get to the generator, activate it. Veronica will sit in the elevator, but after a while, the electricity will disappear. The doctor will start to panic, and we must restore power.
Next to the generator, we find a module that needs to be powered from an active transmitter. The transmitter itself is on the opposite side, in the room on the right. Above this door, you can see the sign "Danger of Electric Shock". The length of the cable is enough to power the module if we jump on the generator from below, and then onto the pipe on the right.
We sit in the elevator, we try to distract Veronica from her phobia. To do this, select "Help Veronica get distracted and talk about something else." We find ourselves in a room with locked doors, climb the ceiling lining and move to the next room. We open the door from the inside after we find a room with paintings on the walls. Here we also climb onto the ceiling lining and get into another room.
In this room, we find a module that needs to be powered by an active transmitter. Recall that the active transmitter is located at the elevator. We follow Veronica to the door, then return to the control panel and use the VGM key. Power will appear, but the door to the room will be locked. The next room can be accessed through the ventilation shaft. We break open the bars on the wall and get into the office of the director of the center.
We get to the command center and watch the cut-scene. After the energy is restored, the system will recognize the virus and try to destroy it with a chemical weapon. We need to get to the control room and find the blocker in the first aid kit before the time runs out. We climb to the second floor and use the grappling hook on the ventilation pipe to get into the control room.

Later, Veronica joins us in the control room. We learn all the necessary information from the terminal, deal with the first group of renegades and return to the doctor. Veronica says there are missiles targeting the city.
If Aiden hasn't given control of the radio station to Frank, then he won't be able to notify the survivors and leave the bombardment zone himself. Later, following the path of the peacekeepers, will result in Frank's death.
Soon a second group of renegades will appear. We kill all enemies and return to the control room. Veronica gets scared and runs to the elevators. We use ventilation to leave the room and get to the elevator shaft. We climb a few floors higher, save Veronica, and run away from Valts through the complex. Once outside, we fight with Waltz. As with other bosses, Valz's attacks cannot be blocked. We make several blows to the enemy, then we use evasions. It is enough to remove about half of the boss's health to trigger a cut-scene.
Breakthrough (Path of the Survivors)
If we follow the path of the survivors, we can meet with friends in a bar. After the cut-scene, we kill the renegades and decide what to do. If we help Frank now, then later we will get to the truck anyway. If we leave Frank, he will most likely die. To help him, you need to go to the healer on the island, which was previously attacked by the Butcher's people. She will instruct to collect herbs and take them to the wounded.
Assassination (Path of the Peacekeepers)
We communicate with Loan and go to Jack Matt on the ship. If we follow the path of peacekeepers, then now we will see a scene with Juan. In a conversation with Matt, choose:
- [Confess] Everything is very bad - Aiden will tell Jack that he cannot control the mutation.
- [Try to distract] What if Juan was telling the truth?
We return to the Fisheye bar, learn about the attack of the renegades. If we follow the path of peacekeepers, then Frank will die, and Loan will want to take revenge on the Butcher. In this case, we can try to dissuade her:
- [Try to persuade Loan] - the girl will wake up before you and go to the colonel.
- [Disagree and end the conversation].
The next morning, Jack Matt informs you that you can get into the Butcher's fortress with the help of a truck. We get to the marker on the map, we see how the truck drives into the garage. We rise to the second floor and interact with the door. At this point, the game will inform you that before the epilogue, you must complete all your business in the city. After the final task, you can return to the city and also explore it by completing additional tasks and exploring points of interest.
Now or never
Open the door, watch the cut-scene. Aiden finds himself in an underground parking lot that you have to get out of. There is not much point in fighting them, as there will be too many infected, and it will be possible to replenish supplies only after the task is completed.
We get to the next building, we go down to the first floor along the elevator shaft. We fight with the renegades, then we find the only active door that leads to a makeshift garage. We approach the truck, watch the cut-scene.
We can get into the fortress in stealth or kill about two dozen enemies. We climb into the building, kill a few more renegades and pay attention to the hatch in the floor. Interact with him, swim to the right and get to the stairs.
We follow the ventilation shafts and get to the colonel. If Frank is dead, we'll meet Loan here. If he is alive, then the sniper will stay with him in the bar and we will have to communicate with the Butcher alone. In both cases, a decision needs to be made:
- Kill the Colonel - The Butcher opens the floodgates and floods the city.
- Believe the colonel - we go to the laboratory X13.
If you believe the colonel, he will offer to inspect Waltz's room in the west wing. Here we can find three collectibles "Waltz's Notes". We leave the building and communicate with the Butcher on the bridge. Before the dialogue, we can sell or purchase some things from the merchant.
X13
The driver will take you to the entrance to the lab, but Jack Matt's men will attack the car along the way. The peacekeepers did not like that Aiden agreed to cooperate with the Butcher. We deal with several soldiers, then we kill Matt. We leave for the destroyed part of the city, go down underground (in the location where the metro was previously located). To see the clues, we can use our intuition.
We watch a video on the engine, after which we follow the laboratory. At the entrance to "X13", we will be met by Loan or Hakon (depending on the decisions made earlier). If we meet with one of the heroes now, we will certainly find the second one in the laboratory.
After the cut-scene, we wait until one of our friends opens the door for us. In the room on the right, we find useful items in boxes, and the room on the left will lead us to Loan or Hakon. In any case, very soon we will meet with these two heroes.
We deal with the renegades, then we run away from the infected to a safe area (area with UV lamps). There is no point in fighting strongly infected here, as they can kill Aiden with a few blows.
We examine all the chambers, we find several collectibles. These included a photograph from Mia's birthday, the test subjects' medical records, and a nursery rhyme for Dr. Waltz. We find the office in which Waltz experimented on children, we see flashbacks. After that, we follow the trail of the doctor (we use our intuition) and fight with several groups of renegades. Find Waltz and fight him.
Battle with Waltz
The boss uses only three attacks:
- Punch - we can dodge this blow.
- A powerful blow to the ground - it is impossible to dodge the blow, so before the blow, we try to break the distance between Aiden and Waltz.
- Directed Strike - Waltz slams the ground, after which some of the energy is directed towards Aiden. If you dodge too early, the charge will hit the hero. You need to dodge right before your hand hits the platform.
We try not to fall from the platform, as the sound of the fall will attract the infected. If we allow this, then we will fight not only with Waltz but also with zombies. When the boss has about one-quarter of its health left, it will mutate.
Now Waltz will start to run away from the hero and hide in the chemical zone. It is not worth running after him, since Aiden will simply lose his immunity and may die from chemical contamination. We are waiting for the boss to come to us and attack. At the same time, we dodge normal and charged enemy attacks.
Waltz moves on to the next stage of mutation. Now we need to follow him on the platforms and strike. There is nothing complicated here, the main thing is to dodge Waltz's attacks. After Aiden himself starts to turn, just beat the boss with his hands until the cut-scene starts.
The final
Final decision:
- [Let Loan Detonate the Bombs] - If we saved Hakon and are on good terms with him, then he will save Loan. Otherwise, we will save the city, but Loan will die.
- [Save Loan] - The city will be destroyed, but we will save Loan.
Comments
Post a Comment