Location of all personal letters, secret documents, items, stone eagles, and workbenches in the third mission of the game
Here's how to find all the collectibles in the Spy Academy mission, including personal letters, secret documents, hidden items, stone eagles, and workbenches. In total, this mission can find 19 collectibles.
Personal Letter #1: "Parking Problems"
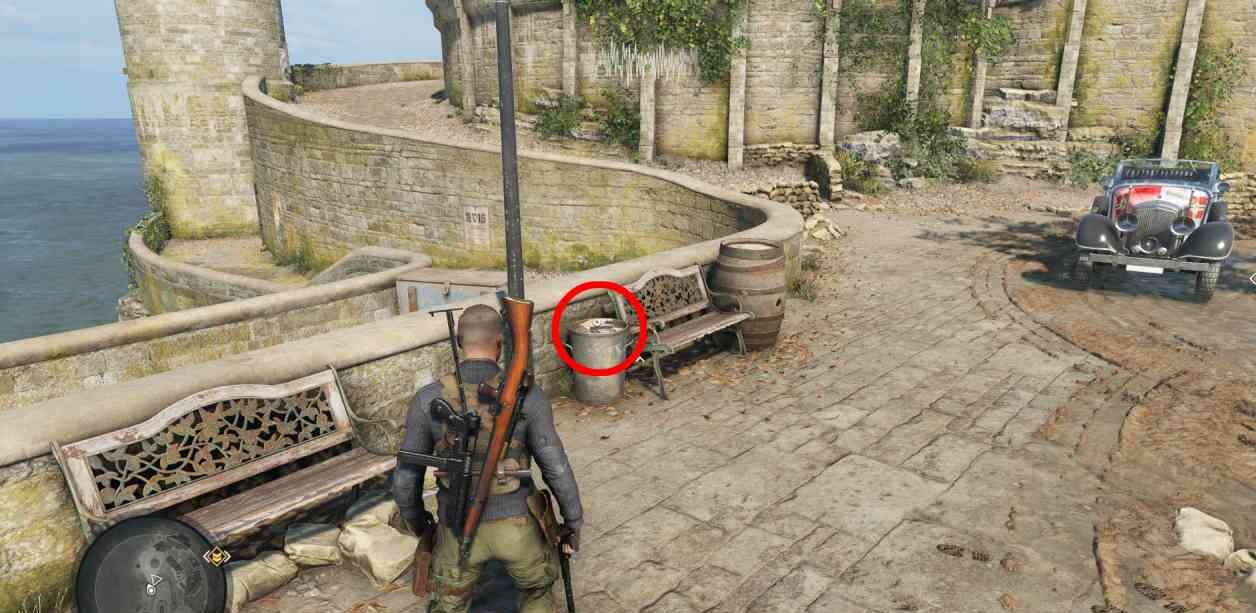
In the southwestern part of the city, to the left of the white car, on a trash can.
Personal letter #2: "Fragile, don't break"

At the very beginning of the mission, before you get to the beach and the bridge leading to the main area, there is a Nazi checkpoint. Look for the second personal letter on the steel box.
Personal letter #3: "Don't be late!"

Can be obtained from an enemy with a unique cocked hat (other enemies wear helmets, have no headgear, or are officers). After entering the square in the south of the city, follow the road to the left (west) until you find a parked white car with two swastika flags on the front. To the left of the white car is a path leading to the tower. The enemy you need is always next to this tower. Stun him with the square and search him with the triangle to get another collectible. There are other enemies wearing the same hat, but this one, standing next to the tower, has the item. Killing him is another extra objective! The best option is to sneak up on the enemy at the beginning of the mission or just run past all the opponents. If you raise the alarm, he may move.
Personal Letter #4: "It's Easy Money"

In the far east of the map, not far from the outskirts of the island, there is a sniper nest. Use the stairs to get inside, and then search the table for a personal letter.
Personal letter #5: "Visit"

In and around the church on the east side of the main island, an officer can be found who has key information about Fabian Richter. Kill him and search the corpse to get a personal letter.
Secret Document #1: "Priority Package"

The island has a main road that passes through several main buildings. Follow this road from the west to the center, south of the main buildings. Here, look for a small room that can be accessed through a window. There is a secret document on the shelf.
Secret document #2: "I won't come"

Cross the bridge to the main island and then get closer to the main mission objectives related to the Operation Kraken meeting. A little to the east is a building that can be accessed with a couple of stairs. You will find yourself in a well-furnished room. On the table inside the room, directly opposite the entrance, lies the second secret document. In the same room, you will find the fifth secret document.
Secret Document #3: "Training Scenarios"

To the north of the island, there is a room with access to the sea. Climb the stairs and enter the room with the stained glass window. The third secret document lies on the table next to the cellar key.
Secret Document #4: "Request for Resources"

In the church on the east side of the map, take the stairs up to the top floor where the sniper nest is (be careful!). after the stairs, look for the table on which lies the fourth secret document.
Secret Document #5: "The Armory Exposed"

To the east of the bridge on this island, move up the stairs to find a building you can enter. This building is located south of the square guarded by Nazi troops. Once inside, you can climb a pair of stairs to a well-furnished room. To the left of the entrance, on a bench is the fifth secret document.
Hidden Item #1: Kriegsmarine Playing Cards

On the western side of the island, at the top of the map, there is a pub that you can go to. There are playing cards on the table.
Hidden Item #2: Ornate Compass

In the same building where the third secret document was found, in the northernmost part of the island, you need to examine the safe. You will need a safe code or explosives. Inside is a compass.
Hidden Item #3: Covert Operations Field Manual

In the large building north of the island where the Nazis are preparing for Operation Kraken, you need to go downstairs and enter the rest area opposite the fake American diner. On the table, look for another hidden item in the form of a field manual.
Stone Eagle #1

Go to the beach on the west side and look at the building in the southwest of the island. The stone eagle is pointed towards the beach and you can destroy it with a sniper rifle.
Stone Eagle #2

From the nest with the sniper, where you will find the fourth personal letter, move west and look to the right of the main building of the island for a small turret. The stone eagle is part of an architectural structure and is installed directly under the roof.
Stone Eagle #3

In the northernmost part of the map, not far from where you evacuate, there is a sunken tower in the sea. It will be the last stone eagle of this mission.
Workbench #1: Sniper Rifles

Finding this workbench is not easy. It is located north of the large building where the Nazis are preparing for Operation Kraken, in the northern part of the island. However, you will have to use the basement key, which can be found next to the third secret document. This is the only way you can enter the basement from the beachside. Then go up to the building with the training room. You need to go from the west side since the door from the east is locked.
Workbench #2: Secondary Weapon

From the side of the square where you enter the building with the second and fifth secret documents, follow the statue on the east side under the archway. There will be a door marked with the symbol of Resistance. Pick the lock and find a workbench opposite the entrance.
Workbench #3: Pistols

South of the main island, there is a weapon room located in the center of the map. You need to use explosives to get inside and find the third pistol workbench opposite the entrance.
Comments
Post a Comment