We tell you everything you need to know about hunting mages, and how to defeat each of them
Mage hunting is a bit different from what you are used to doing in the game (exploring the world, looking for a room with a boss and fighting him). In fact, the mages you're looking for don't want to fight you... after all, you're an inquisitor! Instead, you need to interrogate the victim of the magician, and then go on his trail.
In practice, this means that we study the victim, after which a special wind directs us to where the Magician is. Eventually, we will attack him. Then he will disappear again, creating several minions. You can often see when ordinary enemies attack not you, but the magician and his minions. In general, it looks strange.
Once the mage disappears again, the wind will guide you to a new area. We'll have to repeat this 5-6 times before the Mage finally decides to stop and fight us.
Be sure to fight his minions to get the various items they drop. In addition, when you finally get the chance to fight the Mage, he will be at about half health, so the difficulties are at a minimum.
However, the most IMPORTANT thing is that you need to save throwing weapons here. When you are finally able to fight the mage, this throwing weapon will play an almost decisive role. Especially if the enemy has low health points. Now let's go hunting!
It's time to get involved in the hunt for the magician. This process is a little different from the banal exploration of the world and the battle with the bosses. Let's go in order.
Caelus Zend, Winter Sorrow
After finishing with the Valley of Forgiveness, go to the Mirror Teleporter and return to the village of Ashbourne. Here you can go to the right and use the grappling hook to go upstairs and talk to the man in the house. Ask for killing mages to get a new emote. Choose any answer and he will say that there is a victim of a pyromancer in the house. However, instead of him, I suggest that you first go after the cryomancer Caelus Zend. We'll deal with the pyromancer in the next chapter (although the mages can be hunted in any order).
Now go left (west) and kill the enemies. After destroying both, look to the right for another capture point. Use the grappling hook to cross the gap and enter the house. There is a frozen victim here. Walk forward and interact with the man covered in ice. You will receive a message: "A new mage hunt name has been discovered: Destroy Caelus Zend."
Agree to hunt, and you will see the wind, which will show the way to the magician. For now, go right to the next NPC. This is merchant Arnald. Talk to him to "rescue" and automatically send him to the Valley of Forgiveness, where he will open a shop. The next time you visit the Valley of Forgiveness, meet a merchant.
Also, while we're here, look to the right for the pilgrim's mail. Pull the lever to unlock another grapple point on the right side. It will allow you to quickly climb to this place from below, where the NPC (who gave the emote) was. Now go west and try to find Caelus Zend. This is a huge enemy that can create different types of minions. After that, he will run away.
Here are the minions you may encounter while hunting Caelus Zend:
- Burning Scullin: nothing out of the ordinary. Come close and hit until complete destruction.
- Ice Troll: Roll to avoid damage from a jump attack.
- Exiled Furclad: These are gigantic beasts that love to lunge at opponents. Watch for their attacks, dodge, and counterattack.
- Ice Knight: Arguably the most annoying Cryomancer henchman. Equipped with a shield, tries to get close and strike with a powerful sword. It is best to dodge and counterattack.
Follow the current of the wind and attack Caelus whenever you can. Do this as often as possible, and after it disappears, switch to minions. The wind will send you to where the passage to the village is. After that, you will go back to where you found the icy body. Eventually, you'll climb the stairs outside the room, and finally, be able to fight Caelus Zend.
Caelus Zend is ready to fight you. If you often attacked him during the chase, then the boss will have about half of his health left (however, your health reserve may also be reduced). Caelus often attacks with a giant ice sword. He can land two hits in front of him, which means you can roll and counter. He can also lower his sword and attack all over the area you are in. Again, use rolls. Finally, Caelus wouldn't be a cryomancer if he didn't use ice magic. He has several ice attacks, which we'll cover below.
The first attack is Ice Lance. Caelus Zend creates three ice spears that will fly at you. Try to run up to him and roll behind him so that the spears fly past. To do this is quite simple.
The other two ice attacks are much more dangerous. Caelus can cause ice spots to appear in the arena. These spots stay in a place like mines and explode if you get close to them. They disappear after a while, so you just have to stay away from them.
Finally, the last attack of Caelus is the most terrible. It creates a floating cloud that slowly approaches you. The cloud periodically launches ice spears. Very dangerous as the battle is still going on! There is no other choice but to move as far away from the cloud as possible, rolling past it whenever it approaches. The cloud will disappear on its own after a while, but the craziest thing is that Caelus sometimes releases two clouds at the same time.
As bad as it all sounds, this boss fight isn't all that difficult. The main reason is the vulnerability of Caelus to ranged weapons (arrows, spears, axes). You will be able to kill the enemy with some long-range attacks, unless, of course, you listened to us and did not use up half of the shells. Incendiary bombs will be good too. Use any ranged weapon and finish off the magician. If the shells are used up, and the magician is alive, act as carefully as possible and calculate his moves. Pick the perfect moments to attack.
Once you defeat Caelus, he will turn into a human. Collect the loot (ice items and artifacts) and then talk to the man. He will be talking nonsense, so you can answer as you wish. The mage will be eliminated. Collect loot and trophy. The artifact you received enhances ranged damage (as you know, this is very important) and gives a chance that the launched projectile (throwing weapon) will be returned. Artifacts may differ in name, but almost always have similar characteristics. That is, you may have a slightly different artifact, different in name from ours, but for sure it will increase long-range damage.
After you kill the magician, return to the Valley and level up. You can try to create an ice weapon at the blacksmith, and then level it up. If you craft something from the loot dropped by the mage, you will get another achievement. And now we go for the second magician!
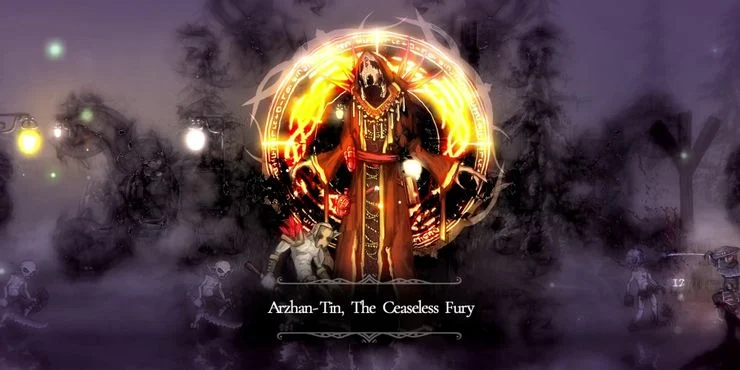
Arzhan-Tin, Continuous Fury
It's time for the second hunt. Or first. Depending on the order in which you hunt mages. This time we are going after the pyromancer Arzhan-Tin. His victim is closer to the beginning of Ashbourne village. After teleporting to the village from the Valley of Forgiveness, go to the right, grab the point above and talk to the person who wants us to talk to the tree above us because by this moment one Mage has already been absorbed (if you haven’t done this, then you won’t know about the tree either) ).

Jump to the right and kill the archer, and then go left to the small castle gate that is under the man we just talked to. Here you will find the charred remains of a pyromancer's victim, as well as a lever that can be used to open another door. Do this and then interact with the corpse. Receive the message: "A new name to hunt the mage has been discovered: Consume Arzhan-Tin." Let's go hunting!
Follow the wind into an area that hasn't really been explored. If you want, you can go down and open the door with a green seal (because we have already killed the magician before). When you're ready, go back and keep going to the right. Kill the archer and find the mage. With any luck, the mage will fight a Scullin and a brute, so join the fray and attack the mage as many times as you can until he disappears. When this happens, kill all remaining enemies.
Let's take a look at what minions the pyromancer Arzhan-Tin can summon:
- Burning Scullin: nothing out of the ordinary. Come close and hit until complete destruction.
- Wandering Ashes: These enemies are also similar to Brutes. They are large, try to get close, and attack exclusively in close combat. Roll and counterattack.
- Giant spiders. Try to kill them as soon as they appear. They try to attack in close combat, but they can try to jump from above. If they manage to jump on you, they will inflict many blows with their paws, significantly reducing the supply of health points.
Now that you know about the minions of the pyromancer, after the first meeting with Arzhan, follow him to the right. You will be taken to the area where the magician fights with the usual opponents of the game world. The perfect option so runs up close and attacks until he disappears. Only after that, kill ordinary enemies.
Now you need to go to the Craterstone mine. Another new location, although now we will visit it exclusively bypassing. Go down and to the left, again facing the magician. Scullin's, archers, and brutes will appear, watch out for minions and regular enemies, which are a little more here. Although the primary task is the same - to attack as much as possible the magician himself.
Soon he will leave to the left, back to Greymoss Mire. In reality, he is heading to where you fought Urix, the first boss of the game. There will be a full fight here.
The battle with Arzhan-Tin is quite interesting. He uses fire attacks, so let's first break down his moveset. First, you should know that Arzhan-Tin is not a melee fighter. He has a large fire sword (more like a katana) that he will swing twice in front of him. If you stay away, then he will rarely use such an attack. Instead, Arzhan-Tin likes to use his Fire Spray attack. He releases a fiery stream that envelops the earth. The enemy can do this directly in front of him or at a short distance behind him, so be careful even if you crept up from behind. Arzhan-Tin can also create a wheel of fire and launch it at the hero. Luckily, it's pretty slow, so take your time and dodge.
Arzhan-Tin likes to throw "Incendiary Bombs" that detonate with a slight delay. Nothing complicated. Just stay away until the bombs go off. On the other hand, they appear on the ground randomly, so there is a random effect. You might get lucky and the bombs won't be around, or you might be unlucky and you won't have time to escape.
As in the fight with the previous mage, Arzhan-Tin will have about half of his total health left at the start of the battle. If so, then use arrows or throwing axes to finally finish off the boss. Another tip: during the Fire Spray attack, you can jump and attack the boss in the air to avoid the flames as much as possible and still deal damage to the enemy. Watch your health and keep advancing, avoiding the above attacks as much as possible. Soon you will destroy the pyromancer.
Once you defeat Arzhan-Tin, he will turn into a human (as well as a cryomancer). Like last time, collect the well-deserved loot (including the artifact) and then you can talk to the man. Answer at your own discretion. Take your reward. Also, get an achievement.
Like last time, return to the Valley of Forgiveness and level up the Inquisitor. Alternatively, you can talk to the blacksmith and see if there are any specific items you can craft from the remains of the mage you just killed.
Kundry Kan, the Drowned Beast
Hydromancer is a bit simpler than previous mages. It uses the elemental elements of ice and darkness, so if you have an Ice Weapon, you need to switch to a regular one (or another). I strongly recommend using weapons made from pyromancer parts. And if you're using heavy armor, create cryo armor.
In addition, unlike the first two magicians, if you followed our guide, you have already studied all the areas that Kundry Kahn will move through. If you don't remember where the victim was, go to the right from the beginning of Ashbourne village, enter the Archridge area (right entrance to the square) and move up and exit to the door in the upper right corner to find the area with the victim.
As usual, he will summon minions that, like the mage, can fight your normal enemies. So, here is who Kundry Kahn can summon:
- Burnt Scullin: simple enemies. Attack until you kill.
- Panphibia: These are huge frog demons armed with a spear. They act very much like a common Brutus.
- Hydropods: These are "balloons" from which legs and several arms protrude. They like to wave their arms and, when you are at a distance, throw black balls. Irritable but easy to deal with
- Krayark: The most dangerous of all. These are huge brown crab-like creatures that love to slam the ground in front of them, as well as jump forward followed by a pop.
When you chase the magician, beware of some of his attacks. His Falling Bubbles attack is sporadic, but trying to dodge the bubbles while dodging minions at the same time is very difficult. He can also summon jets of water that come out of the ground. Again, they are random and easy to dodge but doing so while fighting minions or normal enemies is definitely harder. Sooner or later, you will catch up with the magician, and you will be able to join the battle.
It's time to kill Kundry Kahn. Dealing with him one on one is very easy. Mostly because most of his attacks are random and sporadic. The Bubble Drop attack, while impressive, is quite a stretch. If you time it right, you can walk between the bubbles, get close to the boss, and attack. Or even use ranged attacks. The same can be said for the Geyser attack, where fairly large holes appear on the ground, and a second later a large geyser erupts. Deals a lot of damage, and lifts you into the air, but if everything is done in a timely manner, you can stand between the holes and continue beating the magician.
Of course, say than do. For some time after these spells, Kundry Kahn freely walks around the location. This is the most dangerous part of the fight as he will try to hit you with his huge mace. However, in general, this boss is quite slow, so you should be able to roll behind him and avoid damage.
Another spell worth paying attention to is the "homing bubble". It creates a giant bubble that tries to reach you 2-3 times and then explodes. I recommend running as far as possible and then rolling. Watch your health. When the enemy is low on HP, use a ranged weapon. Take the loot and talk to him with the remaining man. In addition, you will receive a new achievement.
Varren Ovrin, Vile Disgust
It doesn't take a genius to figure out that it's a good idea to stock up on antidotes before taking on Venomancer, though it's not necessary. To create an antidote, you will need leaves. If necessary, you can craft these items right in the middle of the battle. Any attack by this mage, except for a knife stab, can inflict a poison effect. You can not miss too many hits (thorns).

To start the hunt for Venomancer, you need to enter the Stonehall dungeon. The sealed door to this area is inside Craterstone Mines. Go down the stairs, go east, and soon you will find a large room with a victim of the magician.
Venomancer Attacks:
- Normal Strike: A simple downward slash that Venomancer performs when you are in close proximity to him. It's easy to dodge.
- Venomous Spikes: Venomancer fires several spikes that fly in your direction. You can dodge if you time it right. It will be difficult if ordinary minions interfere with you.
- Circle of Spikes: Creates a circle of spikes around the main character, after which all spikes fly straight to the center. These are the same spikes as in the previous attack. When you see this, roll outside the circle.
- Poison Puddles: Creates small black circles near you that explode and release spikes after a while. Several puddles are created sequentially, so you can't standstill. You have to keep moving. This is the only way to avoid this attack. Luckily, this all happens rather slowly.
How to defeat Venomancer
Try to lure out the Green Guardian located under the boss arena. Deal with him before you fight Varren. Otherwise, he can jump into the arena right during the battle and become a serious help for Venomancer. However, this is a fairly strong magician, so he is dangerous even in a one-on-one battle. Venomancer's attacks don't do much damage (other than a normal hit). You can fight up close and then roll back when you need healing. However, in this case, antidotes will be needed. As long as you successfully dodge and keep an eye on the poison effect (by knocking it out with antidotes), you shouldn't have any serious problems in the Venomancer fight.
Eryx Greycloud, Chaotic Abyss
Electromancers are the most powerful mages you can encounter in Ashbourne Village. They have many different tricks and tricks, that cause serious damage. Moreover, Electromancers fly in the air, so you will have to change your usual tactics. To start the hunt for this mage, you need to visit Valsnight Square - the platforms located immediately after the place where you fought the Green Hunter boss. Jump up to the victim and start hunting. The mage will be nearby.

Electromancer Attacks:
- Lightning Spear: The Electromancer summons a bright, glowing spear and fires it at you at a downward angle. This attack is immediately followed by a ground slam, causing a series of telegraphed bolts of lightning to be passed through. Sometimes two successive rows of lightning appear.
- Static Discharge: The Electromancer raises both hands upwards to start charging with electricity. In this case, one of the hands generates a constant downward discharge. The enemy then fires electrical bolts at a short distance. They are incredibly hard to dodge, so ideally rollback.
- Long-Range Static Discharge: A long-range version of the previous attack. It can be understood that the magician uses this particular technique if the discharge is slowly moving up or down. The magician strikes with lightning in the direction in which his gaze is directed, so if you find yourself in the line of fire, defend yourself. If you are behind the magician, you can safely counterattack him.
- Charged Sphere: The Electromancer creates a slow-moving charged sphere that splits into three fast homing projectiles. Pretty easy to dodge, but often the Electromancer combines this technique with electric spears, making it difficult to find the right moment to dodge.
How to beat the Electromancer
This battle is a test of two things: how well you can telegraph your opponent's punches, and your ability to pick up moments to counterattack. The best time to safely attack an Electromancer is when he uses his Long Range Static Strike attack if you are behind the enemy.
At the same time, do not overdo it with the number of strokes. You will probably have to use air attacks to hit the enemy. Melee attacks with an electric spear are too fast, and if you linger, the mage will easily punish a hero stuck in the air. Be careful and choose the right moments for short attacks.
If you miss a lot of damage, you can deal with the destruction of the usual minions summoned by the Electromancer, which can drop resources to create the Seeker's armor. This armor will give decent resistance to fire and light, reducing any damage taken in this fight. The set belongs to light armor of the third class. Alternatively (or in addition) craft a Red Amulet that requires a Pyromancer's Heart.
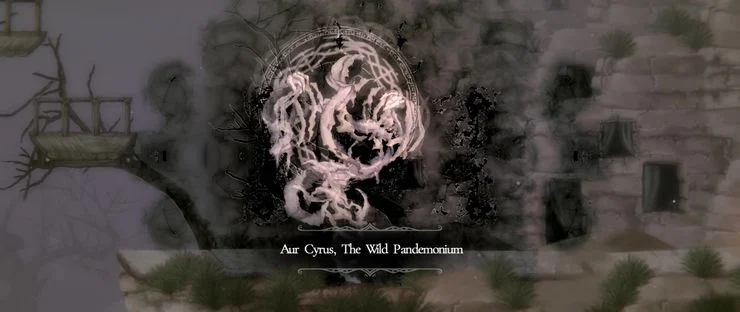
Aur Cyrus, Pandemonium
Aeromancers are irritable opponents that can infuriate anyone with their knockback attacks. It's especially dangerous to confront them in Bol Geran, as the chase will most likely take you across destructible platforms located halfway to the Praying Giants. Once you get the magnesin (tool), go to the western part of the Praying Giants, to the second huge tree. To the east of the tree is a platform with a magnesin pulley. Activate it and rise to the victim of this mage. As a result of the chase, you will most likely find yourself in the eastern part of the Praying Giants region.
Aeromancer Attacks:
- Whirlwind: The Aeromancer summons a tall whirlwind that moves slowly to the right or left. If you hit the whirlwind, you will rise into the air and take repeated damage for a short period of time. Whirlwinds can appear next to the magician and move away from him, or vice versa - away from the magician and approach him. It's easy to dodge.
- Flying Sickles: The mage raises his hands and throws several spinning sickles at you. Make transitions.
- Sword Strike: The mage slams the glowing sword on the ground in front of him.
- Bouncing Strike: Similar to a normal strike, but after it, the mage dodges backward.
- Sword Sweep: A simple slashing attack that starts high up behind the mage and cuts across the ground.
How to defeat the Aeromancer
Aeromancers tend to be very aggressive and bloodthirsty if they sense a vulnerability in you. If you fall into his whirlwind, then the aeromancer will surely have time to land several melee attacks. The best option against an Aeromancer is to use a ranged fighter. You can easily dodge the emerging whirlwinds. The enemy does not throw sickles very often. Use this to your advantage - heal while away from the enemy and deal damage while staying at a safe distance. In close combat, you will have to rely on a large supply of endurance and good armor.
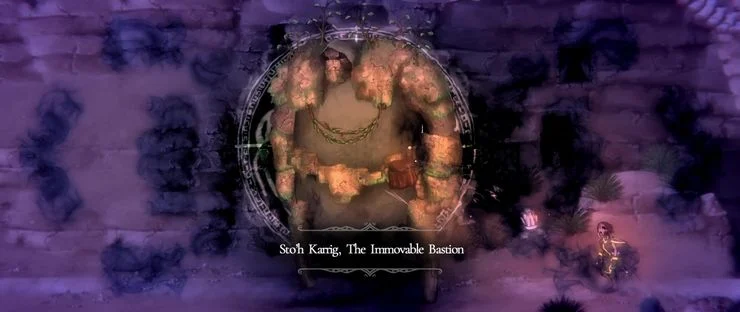
Sto'h Karrig, Strong Bastion
Terramancers are dangerous opponents who will gladly beat you up if you give up. The prey that needs to be inspected to start the Terramancer hunt is located in the Creeping Cave. But before you can get inside, you have to kill Aura Cyrus. The victim should be looked for near the entrance to the Forsaken Gorge, which is located in the southwestern corner of the area.
Terramancer Attacks:
- Stomp: One of the mage's favorite attacks. Terramancer will stomp the ground, which in an instant will lead to the appearance of stones rising up. Immediately after the first stones appear under the mage's foot, another cluster will appear under the place where you are standing. You need to time your dodge and roll right before the second cluster of rocks appears. Stones burst out of the ground at an angle away from the mage, so you need to dodge towards your opponent.
- Rock Spikes: The Terramancer slams into the ground, launching a horizontal row of rocks that rise from the ground right in front of the mage. If you can, roll behind the Terramancer and then you can counterattack him.
- Rock Rain: This attack telegraphs well. The magician raises his fist, which causes flying stones to appear, then hurls them at you. This is a slow attack, rocks are easy to dodge. Another great move to counterattack the enemy.
- Boulder Crash: The Terramancer summons a boulder and then shatters it with both hands. After that, the actual attack begins, which is a ground-level thrust. If the enemy hits you, then you will receive serious damage.
- Ground Slam: The mage slams the ground in front of him. Be sure to avoid getting under the distribution.
- Flying Ground: The Terramancer leaps towards you and slams both hands on the ground. Both the jump and the strike will deal damage. The attack is telegraphed, but rather fast, so you need to be ready for it in advance.
How to defeat the Terramancer
If you look closely, you can determine how the Terramancer will attack - throwing stones or hitting the ground. In both cases, he raises his hand, but if he is going to throw stones, then it will be raised much higher. The most important thing is to study the stomp and the collapse of the boulder. These are the mage's most devastating attacks, as they can knock back the hero, and the Terramancer will be able to land a few extra hits before you can recover.
In the case of Terramancer, you need to dodge a lot more often. Try to choose the lightest equipment possible and create accessories that increase endurance.
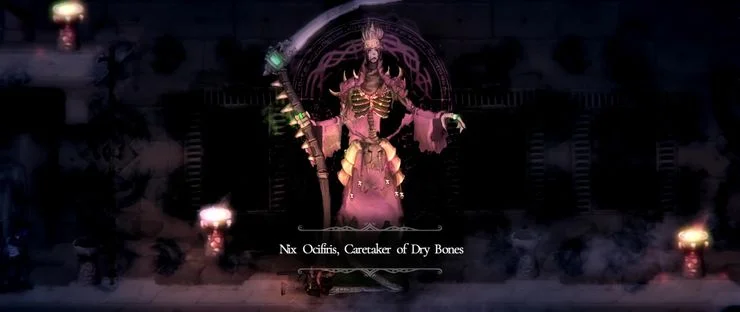
Nyx Okithiris, Keeper of the Detained Bones
The Necromancer is an enduring video game classic, and Salt and Sacrifice continues their legacy. The mage looks like a huge skeleton with a scythe, using the appropriate attacks. The victim to start the hunt for Nyx Otsifiris can be found inside the temple of Bol Geran. To gain access to this area, you must kill the Indefatigable Exalted. Once inside the temple, look for a clue in the eastern part of the building, about halfway - near the entrance to the Unholy Oasis.
Necromancer Attacks:
- Homing Skulls: The mage summons several skulls that fly at the hero. They act pointwise, but they are easy to dodge.
- Skull Rain: The Necromancer places one hand on his waist, showering the area around him with a rain of skulls. When you see him doing this, just move away.
- Spewing Skull: The mage summons one large skull that opens its mouth and begins to spew poisonous gas. The skull leans towards you very slowly, but you shouldn't take it as a serious threat. Rather, it is something like a trap in the location.
- Bone Cutter: The mage summons two curved bones, one on each side of you. After a moment, they will fly towards the center, past each other, dealing damage on impact. It's important not to panic here - stay equidistant from the bones and roll at the moment they touch so that your invincibility frames avoid both bones at the same time. Rolling over one bone too early will cause you to hit another, and vice versa.
- Scythe Strike: A simple and quick scythe attack. This hit is hard to dodge, but the weapon has a small hitbox and is more likely to miss accidentally than hit.
- Scythe Sweep: A highly telegraphed attack that begins with the mage lifting the scythe into the air and then swiping the weapon across the ground. Often accompanied by a regular scythe.
How to defeat the Necromancer
Necromancers are quite fragile and can't handle sustained attacks well. Use their lingering attacks like Homing Skulls and Skull Spewing to land some of your hits. Skull Rain is usually used by the mage to force you to move further away, but this attack is rather weak and usually doesn't interrupt your own impulses. So you can safely tank and trade blows with the boss. This is a working strategy. Just make sure you're ready for the next attack, and when you need to heal, roll to the side.
Padra Sakrev, Porter of Wine
This saint can be called one of the most difficult magicians you have ever encountered up to this point. The main danger is hard-to-read attacks and attacks. To start the hunt, interact with the skull in the box found in the upper levels of the Bol Geran Temple. To do this, you need to defeat all previous magicians, including the Necromancer Nyx, after which you will gain access to this part of the building. You can get inside through the sealed door at the top of the Praying Giants, or simply by climbing up the inside of the temple.

Thaumant Attacks:
- Sacred Beam: The Thaumancer summons a bright light that forms into a powerful beam that strikes the ground. You can rollover this beam, but over time it will split into smaller pieces.
- Striking Beam: The Thaumancer raises his hand, which immediately glows. The patch of ground under your feet will begin to glow. In a moment, a large column of light will hit this place. As soon as you see a glow below you, roll to the side.
- Spinning Light: This attack creates a cloud of light mist within which lightning bolts appear. It's easy to avoid getting caught in the fog cloud, but the arena will become smaller for a short time.
- Mace of Light: The mage summons a mace of light that strikes the ground.
- Flying Maces: The mage summons several maces near the hero, and after a few seconds they fly at you. Do not stand still, and then you can be guaranteed to avoid blows.
How to defeat Thaumant
The "spinning beam" the mage uses to not force you to move away, but in fact, it is the perfect moment for your ranged attacks. Use projectiles and so on. This same moment is suitable as a respite for healing. Most of the Thaumancer's attacks are devastating, with the exception of the small wisps of light that the sacred ray breaks into in the second phase of the attack. They can be easily blocked. The key to victory in this battle is the ability to recognize the upcoming attacks. This is much more important than during the battle with other magicians. You need to know if Thaumant the Striking or Beam is preparing, or is about to launch flying maces.
Ture Vasari, Bloodstained Blade
These mages are like a mixture of vampires and spiders. Despite their seemingly harmless appearance, they have some pretty devastating attacks up their sleeves. To find the magician, you will have to go into the depths of the temple of Bol Geran to find a victim. And for this, you need a glowing stone from the Corvius Swamps. Go through the door to the west of the lowest level of the temple and use the large gap you find by using the glowing stone on the circles. Search the bag for a clue.

Vasari attacks:
- Jump Kick: This is a simple jump attack that ends with a downward thrust. You can easily dodge by slipping under a flying enemy.
- Front Leg Kick: Vasari leans down and uses the spider legs that will grow from his back to attack the nearest patch of ground. It will make two hits at once, both in your direction, so if you roll to the enemy behind your back, you can avoid the first hit. But then the enemy will turn around to deal a second one, so you need to roll behind your back again.
- Piercing Flurry: The mage makes several sword slashes in one direction while advancing forward. As soon as the attack starts, the enemy will be forced to finish it, that is, it will be busy with this animation. You will be able to dodge it. After the initial flurry, he will deliver a final, powerful blow in your direction. This is the most dangerous attack of the mage.
- Blood Explosion: The mage raises his sword for a moment and then cuts through the air, dodging backward. The result is a large horizontal burst of red energy. This attack is necessarily accompanied by a piercing barrage attack in the same direction as the explosion.
- Blood Orbs: Vasari forms three large red orbs and sends them around the arena. Use rolls to avoid getting hit.
- Blood Beams: The mage summons several small red orbs. They form in pairs and generate a beam of red energy between them, which will slowly move in your direction. If you hit the beam, you'll probably get serious damage. So roll back from this attack.
How to beat Vasari
This fight comes down solely to the study of the magician's attacks. You need to learn how to choose the right moments to avoid a penetrating squall and strike with your front foot. These are the most dangerous attacks, which often lead to defeat. The attacks you need to use for your strikes are Blood Orbs and Blood Beams. At these moments, the mage will be stalled by the animation of the techniques. You can deal a lot of damage, especially when using fast weapons. For example, rapiers. Consider using the lightest equipment possible. In battle, you will have to dodge a lot and often. Powerful armor will still be useless if you fall under the distribution of a penetrating flurry of blows.
Por Myec, Invading Rot
Mushroom mages are the weakest in the Corvius Swamp. And in general, this is one of the simplest types of magicians in the game. However, you may have problems with their poisonous attacks, so it is recommended to stock up on antidotes. The prey to start the hunt for Por Miek can be found in Dark Earth Lair. It is located in the western part of the region, below the place where the mimic chest is located.

Gribomancer Attacks:
- Multiple Mushrooms: The Mushroommancer summons a number of mushrooms that sprout on the ground and pose a threat to the hero. If you stand on them, they will explode, dealing damage.
- Multiple Flying Mushrooms: These mushrooms float in the air and fly across the screen, exploding on contact with you. Use transitions.
- Explosive Pustule: Mushroom Mancer creates a mushroom ball that grows and then explodes. Deals damage on explosion also fires four smaller projectiles that explode on impact with the ground. Roll away from the big sphere and be ready to dodge the small ones.
- Mushroom Rush: The mage holds his staff in the air and fires a stream of spores at you. The attack is easy to recognize and easy to dodge.
How to defeat the Gribomancer
The damage dealt by the Fungusmancer is very low but causes a strong poison effect quite quickly. Keep antidotes on hand and be prepared to pick the moment for your own strikes. The mage has low health and is easy to take out with long combos. If you have a weapon with a lot of balance damage, you can end the fight without seeing most of his attacks.
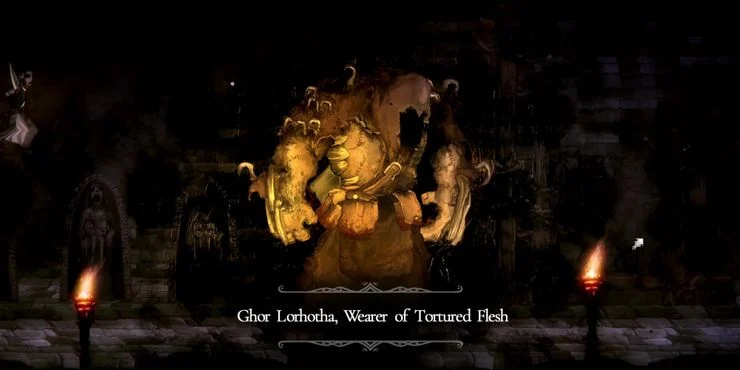
Ghor Lorhotha, Master of Tortured Flesh
This rather grim variety of mages is one of the most frustrating in the game, not least because of the many ways they can block the battlefield and corner you. You'll find the corpse that starts the hunt for Mount Lorhoth in the upper parts of the Green Ruins, in an alcove on the western side of the building.
Lorhot Attacks:
- Cleaver Strike: Double cleaver strike. Well tracked. If you roll during the first hit, the enemy will turn around and hit you with the second. So immediately make the second roll.
- Cleaver jump: exactly what it sounds like. The mage jumps in your direction and hits with a cleaver. Deals a lot of damage. roll under the mage.
- Jaw Trap: Lorchota puts her hands together, causing a trap to emerge from the ground. If it catches you, the character will not be able to move until the trap automatically disappears on its own. As a result, you will become easy prey for any attacks of the magician. However, if the trap has already spawned, you can freely move past it without having to roll. That is, it catches you only at the moment of appearance.
- Cloud of Flies: Lorchota raises one hand up, causing two clouds of flies to appear. They will slowly and continuously chase you, dealing constant damage if you are standing inside the cloud.
- Butcher's Hooks: The mage summons several hooks hanging from chains. After a while, they soar up to the ceiling. If you touch the upward moving hook, you will take damage and be thrown into the air. Dangerous only during their movement!
How to defeat Lorhoth
The main problem in this fight is to choose the moment for your own attacks. These mages have complete control over the battlefield. They can put pressure on you with flies, traps and hooks. As a result, you may panic and try to fight up close. If you learn to dodge in time, then easily defeat the enemy. But in the event that there are no flies nearby.
When the magician's hands are surrounded by a black aura, you should be aware that a jaw trap will appear or the enemy will summon a cloud of flies. If there is a trap, then the enemy will spread his arms to the sides, but if clouds of flies appear, he will raise one arm up. Starting an attack with clouds of flies is a great opportunity for countermeasures since the flies are slow and appear high in the air.
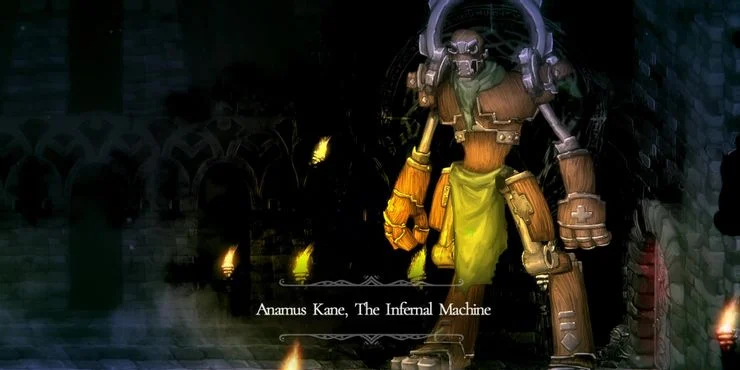
Anamus Kane, Infernal Machine
Robotic enemy with poisonous attacks. The most original and unusual enemy in the game. However, it is easy to destroy. To start the hunt, you need to find the victim right under the entrance to the sanctuary of Veruna. To get to this area, use the western exit from the top level of the Great Tree - you need to get the glowing stone in advance.

Mechamancer Attacks:
- Two Strikes: The mage slams the ground with two mechanical arms, then strikes once. It all happens slowly, so it's easy to dodge.
- Stomp and Spray: The mage stomps to the ground and releases poisonous splashes. Be careful with the spray radius of these sprays - roll further than necessary to ensure safety.
- Jump Kick: The Mechanomancer jumps at you and punches you. The attack has an incredible range and is usually used to close the gap - the attack itself doesn't deal much damage.
- Poison Spray: The mage sprays a poison mist in front of and below him. If you can rollover the mage at the start of the attack, you will be able to attack him from behind.
- Toxic Missiles: The Mechanomancer fires two to three poisonous missiles in a row. The missiles are partially homing, although they won't follow you for very long. Therefore, by staying on the move, you will be safe.
- Poison Bombs: This attack is similar to the previous one, but instead, the mage releases three bombs into the air that fall sideways. One bomb falls right under the magician's feet. The bombs are slow, so just roll through the explosion.
How to defeat the Mechamancer
Hitting any of the poison attacks listed above will gradually build up a poisoned state. As with any poisonous enemies, you need to have several antidotes on hand - for convenience, place them in the slot next to the flask of healing. Like many mage bosses, the Mechanomancer's weakness is the slowness of its attacks. You can easily dodge the first two hits and counterattack your opponent. The same can be done in the first seconds after the appearance of toxic bombs. The enemy is weak in ranged combat, so take a powerful ranged weapon with you and make sure you have maximum ammo. Watch out for the jump hit and you'll be fine.
Zizak Zuun, Cursed Mind
The first fight against a mage at Dreadstone Peak is not that hard. You can start the hunt for Neuromancer in the Temple of Eleven, but you can do this only after defeating the Two Remaining and the Aetherweave Arrow. Climb up inside the temple to find a clue on the west side of the building, below the capture point.
Neuromancer Attacks:
- Light Threads: Creates multiple spheres that connect with thin threads of light. Can be easily dodged.
- Mind Pulse: Neuromancer fires psionic energy from his forehead. This is a powerful attack, but easy to telegraph and avoid. The next attack can be used from the ground or in the air. When used in the air, a pop follows, causing an energy blast around the opponent and a ring of light filaments expanding outwards.
- Tentacle: The mage draws a tentacle from his sleeve and hits you twice. If he hits with the first hit, then you will get from the second.
How to defeat Neuromancer
Neuromancers are easy to kill. Once you realize that they mostly rely on filaments of light that don't deal too much damage, you'll have the courage to be as aggressive as possible. Watch out for melee attacks and you'll be fine.
Draxenerion, the Scaled Noble
Dracomancers are incredibly aggressive opponents, wielding giant swords. After defeating Neuromancer, you will be able to explore the dungeons under the Temple of Eleven. The mage's sacrifice to start the hunt for the Dracomante is located in the Old Annex, located directly under the temple, to the west of the first descent.
Dracomancer Attacks:
- Double Slash: Momentarily bringing his sword to his chest, the Dracomancer makes two forward slashes that are easy to dodge.
- Melee Combo: Dracomancer swings his sword three times. Each swing of the sword is directed in your direction, that is, the boss will turn around if you roll from the first and/or second blow to him behind his back.
- Shockwave: The Dracomancer leaps into the air and swipes down with his sword, creating a red horizontal shockwave. This is followed by the melee combo above.
- Explosive Combo: The mage builds energy into his sword and then plunges it into the ground, causing a large explosive effect. This is followed by a melee combo.
- Fire Beam: The Dracomancer reaches out and fires a beam at the ground that moves from side to side. It creates a fire trail. Both beam and flame deal massive damage. He can perform this attack while standing on the ground or hovering in the air. In the latter case, the attack has the greatest range and is accompanied by a shock wave.
- Fireball: Same as above, but instead of a fire beam, the mage fires a simple fireball that explodes on contact with you.
How to defeat the Dracomancer
This mage is incredibly aggressive and will hardly give you a chance to heal. If you want to succeed in combat, you need to learn how to dodge melee attacks and shockwaves, since these are the attacks the enemy uses most often. The most optimal moment to attack is right after the third hit from a melee combo, at the very beginning of the explosive combo, fire beam, or ball if the enemy is on the ground.
Don't try to attack him in the air. Unless with ranged attacks from a very long distance. Returning to the ground, the enemy will activate a melee attack, and will almost always hit you if you are standing in close proximity.
Keep an eye on stamina and remove armor if necessary until you get the minimum load, which will improve your ability to dodge and dodge.
Nephael Mos, Knight of the Abyss
Despite the intimidating appearance, once you get used to it, the Diablomancer will no longer pose a serious threat. To start hunting, you need to go to the pilgrims' home, in the area between the White Cliff and the Old Annex. Go west from the entrance of the old extension and look for a clue above.
Diablomancer Attacks:
- Magic shooting symbols: the mage creates 1-2 glowing symbols, each of which fires three arrows into the ground towards your hero. The bolts stay in the ground for a while and deal damage if you touch them. It's hard to dodge all the arrows.
- Glowing Glyphs: The mage creates one or two very large glyphs that hover in the air for a while and point towards you, then shoot out a large beam of light. It's easy to dodge.
- Enormous Glyph: An enhanced version of the previous attack. The glyph creates a much larger beam and deals increased damage.
- Light Bolts: The mage creates six bolts of light behind him and then fires them in an arc forward. They will damage you before, during, and after the actual shooting animation, so you'll need to time it right and roll properly to avoid any damage.
- Sword: A simple swing overhead strike. Fast attack.
How to defeat Diablomancer
Theoretically, this fight is pretty simple. None of Diablomancer's attacks are particularly difficult to dodge, with the exception of some of Lightbolt's attack mechanisms. The problem is that when you miss a hit, you take a lot of damage. Don't skimp on Healing Flasks, keep your health high. And don't be greedy, as the boss can stand still for a long time, ostensibly open to attacks. But problems can arise when all of his glyphs and symbols start shooting at you and you get hit by a devastating melee combo at the same time. So throw in a couple of hits and stay away. The best way to avoid the huge glyph is to move away from it. She can only fire at a slight angle.
Zaruman Tam, Ghost of Time
Chronomancer uses slow time effects, and devastating melee and ranged attacks. To begin the hunt for the Chronomancer, go through the sealed door at the top of the Temple of the Eleven.
Chronomancer Attacks:
- Pillar of Frozen Time: Creates three pillars in a row. Anything that passes through them will be slowed down. This applies to both your character and flying projectiles.
- Orb of Frozen Time: Same as above, only in the form of a huge sphere.
- Scythe Strike: A simple overhead sweep of a giant scythe followed by an upward slash in your direction. Even if you roll behind the mage, he will turn around and hit you.
- Airborne Scythe: The mage floats in the air before performing the move described above. You need to make a timely transition.
- Portal Blades: The mage creates a portal in the arena. After a while, sharp blades fly out of it.
- Portal Arrows: As with the previous attack, the mage creates a portal. Arrows fall in his direction. This attack does a lot of damage.
How to defeat the Chronomancer
Do not, under any circumstances, enter the pillar or sphere of frozen time. As soon as you slow down, you will become a convenient target for the rest of the magician's attacks. If this cannot be avoided, try to heal in advance. The slowing effect affects your arrows and other ranged attacks, so be sure to consider these points. You need to learn how to dodge melee attacks, then stick close to the mage and counterattack. Only retreat when you are in danger in the form of a slowdown or arrows from the portal.
Wodin Tenebre, Hidden Shadow
The Umbramancers are perhaps the most dangerous foes you will face on Dreadstone Peak. As expected, you can find a victim to start hunting for Umbramanth in the darkest part of the location, in the caves of the Guardians.
Umbramancer Attacks:
- Sword Strike: This attack begins with the enemy raising his sword above his head and then quickly moving forward. He tries to get closer to you, and if he hits with a sword, then you will fly up.
- Sneak Attack: Umbramancer goes underground and then quickly jumps out directly below you. We'll have to do a somersault as soon as the magician disappears, otherwise, the attack cannot be avoided.
- Blades of Light: One of the mage's most dangerous attacks. Consists of two hits, as a result of which blades of light fly at you. The mage then pauses and delivers two additional strikes, releasing blades of light again. The best way to avoid all four attacks is to roll behind the mage twice. When trying to roll over the flying blades, you will most likely get hit by the next two. The magician will turn around, so you have to make two somersaults.
- Piercing Blade: Umbramancer lunges forward, sword in hand. A very fast attack, but in fact, dodging it is easy.
- Shards of Darkness: A purple light appears and shards fly out in your direction. They hit weakly, but they can temporarily stun you so that the mage performs one of the stronger moves.
- Explosive Sword: The mage throws his sword into the ground, causing tiny swords to explode around him.
How to defeat the Umbramancer
As with the Dracomancers, the main difficulty in the fight against the Umbramancer is related to the aggressiveness of the mage. There isn't much time to rest between his attacks, so danger can arise even when trying to heal. You can create an armor set, which is unlocked after defeating the Diablomancer. It will increase the speed of consuming flasks of healing.
The key to winning this fight is to learn how to dodge the blades of light as they will kill you the most. The trick is to stay close to the Umbramancer at all times and roll through it to dodge attacks. You can focus on increasing endurance and light equipment weight.
Parza Crassus, Manifestation of Power
Kinetomancers are very aggressive opponents, using many melee and ranged attacks. To start the hunt for this mage, go to the western part of the Elder Grove. Climb to the ledge and find the victim (hint).
Kinetomance Attacks:
- Spear Volley: The mage summons several stones to form a spear and then throws them in your direction. The actual spear launching part happens very quickly, so get ready to dodge as soon as you see the spear forming.
- Exploding Rocks on the Ground: Raising both hands up, the Kinetomancer forms three-pointed rocks that rise from the ground near the boss. If you step on them, then fly up. After a moment, the Kinetomancer will explode the stones.
- Exploding Rocks in the Air: The Kinetomancer raises one arm very high up and forms two flying stone blocks. One will be located parallel to the chest, the other - on the side, parallel to the waist. In a moment, these stones will explode. It's easy to dodge. In addition, this attack is an ideal opportunity to perform your own combos.
- Leaping Slam: The Kinetomancer makes a small jump towards you, then slams down with the axe.
- Explosive Leap: The Kinetomancer makes a large leap toward you and slams with its axe. When it hits the ground, an explosion will occur on either side of the landing point, ejecting small rocks that will then explode as well. This move is hard to dodge in the later stages, so roll while Kinetomancer is jumping (in his direction).
- Flying Axe: A three-hit attack with an ax that the mage creates. It goes fast, each hit follows you exactly, so either roll away from the magician, or roll twice behind his back. One of the standard mage moves that he can use right after many other moves, especially after the explosive jump.
- Flying Spear: The mage summons three stones in a row and sends them down. After a short pause, they explode. This move is usually followed by a melee lunge.
How to defeat the Kinetomancer
As is the case with most of the strongest mages in the game, Kinetomancers are very aggressive. Especially when they are low on health. They will form long combos with all of their attacks, especially if you stay close to them all the time. The Kinetomancer doesn't have many countermeasures against ranged fighters. Use this to your advantage and shoot him from a safe distance. The best moment for a counterattack is the explosion of stones in the air. Although you can deal damage to the Kinetomancer if you fight up close, you will learn how to perfectly dodge his melee attacks. This strategy works best with faster weapons.
Logostus Rhyme, Immortal Scholar
The bibliomaniacs are frankly unbalanced. They have incredibly powerful ranged attacks and melee combos that can cause your character to be stunned and destroyed if you happen to be in the wrong place. I'm already silent for the huge damage that all his techniques cause. To start hunting for the magician, you need to move to the eastern part of the Elder Grove. Look for a flying book there.
Librarymancer Attacks:
- Rune Rain (Horizontal): The Bibliomancer creates a horizontal line of small portals in the air that shoot runes in the direction of the ground. To avoid getting hit, you need to move out of the line of fire, as the runes fall randomly and can hit you even at the end of the roll. This may be followed by vertical rune rain.
- Runic Rain (Vertical): This is the same attack as above, but with horizontal portal shots. They are much easier to flip.
- Runestorm: The Bibliomancer creates a circle of runes, then quickly unleashes them at you. The mage uses this attack almost exclusively when you are away from him. If you get caught in a storm, you will take a lot of damage. The attack is very hard to dodge if you are far away as the runes follow you. There are few invincibility frames, so it is difficult to survive. The only sure way to avoid damage is to roll under the mage and end up on the other side. The storm does not spawn behind the mage.
- Rune Runes: Creates one floating rune that sends a stream of runes at you after a moment. They are much slower and easier to dodge than the same Runic Storm.
- Book Hits: This is a melee combo. The mage drops a book on the ground that circles around him three times as he moves towards you. This technique is followed by the second one, but already accompanied by a big explosion. If you fall under the book, you can die. It is important to learn how to dodge in a timely manner.
- Explosive Book: The Librarian holds the book in the air for a while and then explodes it. This attack has a rather small range, so it's the best time for countermeasures.
How to beat the Librarian
If you start the fight far from the Librarian, there's a good chance that the Runestorm will kill you before you can even get close. Try to use weapons with a high block rate to protect against attacks and heal immediately. You can deal a lot of damage to the boss if you can break away from the runestorm as it is a sustained attack. And behind the back of the magician, you will be completely safe.
Another good attack for your strikes is flying runes from a large rune. The animation is long and the boss will most likely be immobilized as a result of your flurry of punches. However, be careful with the runes that come your way - don't get greedy, as they can easily stun you and the mage will beat the hero to death. Study all the attacks of the boss well, and soon you will be able to hold out in battle for as long as it takes to completely destroy him.


Comments
Post a Comment