A detailed walkthrough of all the plot islands of the game
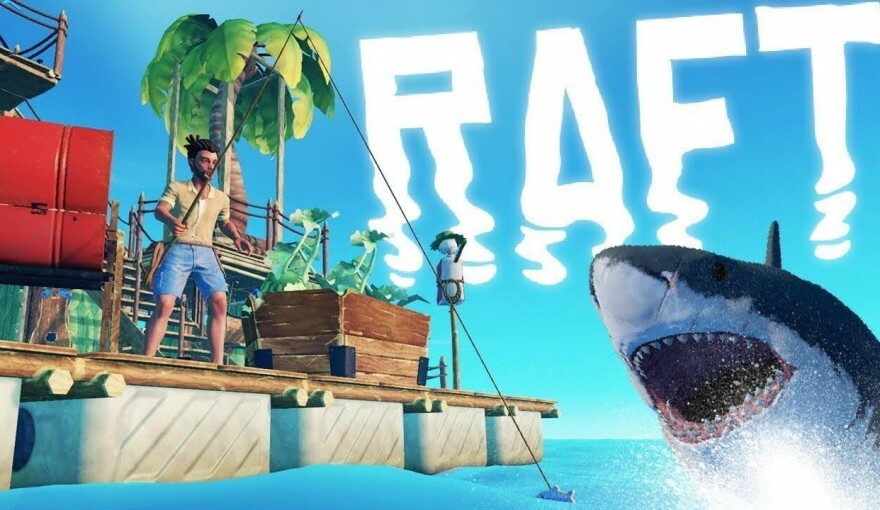
Raft is an open-world survival game full of water. At the very beginning, you find yourself in the middle of the ocean on a small raft that you can improve. Before you can go through the story, you will have to significantly expand the raft and build some equipment. Specifically, you need a receiver and three antennas. But first, you have to get a lot of resources and build other objects. Let's go in order.
How to start a story
As mentioned above, you need a receiver and three antennas. First, start extracting resources that float on water. These are palm leaves, wooden boards, and plastic. Inside the barrels, you can find several resources at once. Use LMB to throw a hook on the rope and hold LMB to pull resources. If resources float by, you can pick them up. And don't forget that there is a dangerous shark in the water.
After collecting palm leaves, press TAB and select the "Resources" tab. Make two ropes. Then select the "Tools" tab and create a construction hammer. Do not forget to provide yourself with food in parallel, but I will not focus on this. When you expand your raft, look under the "Other" tab for a desktop. Build it with 14 planks and 2 pieces of junk. All this can be caught right in the sea (trash - in barrels and boxes).
Keep searching barrels and crates. On the second day of the game and beyond, they may come across important blueprints - a receiver and an antenna. But this is not enough. Look, when you pick up a blueprint, it is added to the list of recipes in the book on the desktop. However, in order to research a blueprint and be able to craft an item, you must get your hands on all the resources you need to craft it. At least once "touch".
How to create a receiver
When you get the recipe for the receiver, open the desktop (more precisely, the book on the desktop) and find the corresponding blueprint. To craft a receiver, you need a board, plastic, a chip, and a hinge. You have already managed to find boards and plastic, they were available, roughly speaking, by default. But the microcircuit and the hinge are two separate drawings.
Let's start with the hinge. To create it, you need an iron ingot. To make an iron ingot, you need iron, which is placed in a smelter. To create a smelter, you need a board, dry brick, trash, and a nail. You already have a board and trash. A nail is created from two pieces of junk. Dry brick can be obtained from wet. Simply craft a wet brick (the blueprint is available by default) and place it on the raft to dry it out. But, before you create a wet brick, look for islands and mine clay and sand on them. Sand is mined from the underwater parts of small and medium islands, but requires a plastic hook (available by default) or a trash hook (required to be opened). The same goes for clay, it is also underwater.
How to mine sand, clay, and iron ore
To create a garbage hook that is more effective than a standard plastic one, you need a board, rope, trash, and a bolt. The bolt, like the hinge, is crafted from an iron ingot. Thus, at first, it will be necessary to extract sand and clay with a plastic hook, and after the construction of the smelter, it will be possible to make a special hook for garbage.
So, when you get clay and sand and make a wet brick, place it on the raft. After some time, you will be able to pick up a dry brick. On the desktop, opening the book, study ALL the resources you have collected. One time. By placing them in the workbench slot, you will see the "Explore" button. Once researched, this resource will be allocated to all available blueprints. As soon as all the resources are allocated in the drawing, you can learn how to make one or another item. For example, you need a bolt for one or another item. After finding the bolt, install it on the workbench, and study it, after which it will be highlighted for all the blueprints available to you.
When you have studied all the necessary resources, build and place a smelter on the raft. To create an iron ingot, you need iron ore. Ore, like sand and clay, is mined in the underwater part of small and large islands using a plastic hook or a garbage hook. With a small degree of probability, iron ore can be found in special containers on various islands, inside the treasures that you find with a metal detector on large and small islands, as well as in crates of abandoned trailers in the Caravan City.
Sand, clay and iron ore look like rocks underwater. Sand and clay are practically the same, iron ore has some kind of brilliant turquoise hue. Clay can be researched at a workbench, sand and iron ore cannot. Place boards in the smelter, pick up iron ore (just in your hands) and apply it to the smelter. Wait, soon you will receive an iron ingot. The ingot must be studied on the desktop so that it becomes available for all recipes.
To create a microchip, you need liana juice and a copper ingot. Look for copper in the same place as iron ore - at the bottom near large and small islands, in the form of a shiny yellow stone. Be sure to study at the workbench. The algae from which the juice of the liana is made should also be looked for at the bottom near the islands. For extraction, nothing is needed, without a tool. Throw copper and seaweed (separately) into the smelter to get a copper ingot and creeper juice. Copper does not need to be studied on a workbench, but algae can.
Craft and study the Hinge, Bolts, and Chips, after which you can learn how to craft a Receiver and Antennas. Install the receiver and three antennas on the raft. The receiver requires a battery to operate. You should have already explored the resources to craft it: plastic, junk, and a copper ingot. The drawing is available by default. Learn to make and make one simple battery. Make sure the antennas are located away from the receiver and apart from each other. In addition, you need to build a receiver with antennas on the second floor of the raft. Having selected the construction hammer, hold RMB and you will see various elements of the raft. Install two or three wooden supports (vertical) first. Connect them with beams. Use the R key to unfold the beams. Continue placing supports. Then put a ladder next to it. After that, choose not an ordinary floor, but a wooden flooring. He is in the same place as the floor,
When you start the receiver, use the keys on the right to select a different frequency until you get a signal on the radar. Point the sail towards the signal and wait. Periodically turn on the receiver (most of the time it should be turned off because the battery is dying) to check the route. A blue marker will direct you to the radio tower.
radio tower
There is really nothing to do here. Go to the tower from the raft and search the first floors. Start climbing up the crates. You must explore all the rooms in the radio tower, each floor. Here you will find blueprints for a headlamp and a recycling device, as well as three notes. The latter will be at the very top, along with the playable character Tala. Just talk to her and you can choose her for further adventures. The last note contains the coordinates of 9605.
Vasagatan
Return to the receiver and use the monitor with the numbers on the right. The red lever allows you to switch between positions, the arrow buttons change the digital value. Enter "9605" to detect a new signal pointing to Vasagatan.
On the way there you can see the green marker. He points to an island with a trading post. The recycling device you found on the radio tower blueprint allows you to process standard resources into those that are used for trade. Consider this. In addition to the trading shop on this island, you will find a wild boar and a vulture that will attack you. There are ingredients, flowers, and even one resource box located at the very top, near the antenna.
Reach Vasagatan. You will see a large cruise ship. Climb onto it from the back and start looking around the rooms. In the very first, there is a note on the table. Also on the left on the table is a crowbar and a voice recorder (used to listen to the audio cassettes you find on the ship). These items don't actually appear in your inventory, but you do have them. So, go to the door on the right and press E to automatically use the crowbar. By the way, if it's too dark for you, create a headlamp, the blueprint of which was found on the radio tower. To turn on the lantern, open your inventory and place it in one of the six clothing slots.
Behind the door, in the room on the left, you can find a mutated rat. There is also a box with resources and a locker that requires a bolt cutter. The door to the right along the corridor requires a blue key. Look into the bathroom, the second door on the right along the corridor, and remove the red key from the hanger. Go ahead, look at the kitchens on the left. Take the note and the red fuel bottle. Use the red key on the last door in the corridor. Pull out the metal part from the locker on the right. On the left, look for a note and a bolt cutter. There are tables to the left. One requires 5 metal parts, the other requires a lighter, fuel tank, bullet and wires.
Go back to the room with the locked cabinet. Use a bolt cutter on him, take Olof's note and the blue key. Open the next door with this key and go up to the second floor. Go through the door on the left. There is a note and a bullet on the bar. In contrast, DJ equipment has a second metal piece. Go outside and look in the pool for the third metal piece. Return and go to the other side of the second floor. Search different offices and apartments. The 3 captain's apartment has a safe that requires a four-digit code. In the next room you can find a note (audio cassette). In the back room with boxes, look for resources and the fourth metal part.
Climb to the third floor and look in the far part of it, behind the door that requires a key card, a table with Olof's note (he talks about some kind of caravan town) and a four-digit code. Also nearby, on the floor, is a fifth piece of metal. Go down to the very bottom, into the back room, and interact with the table to use five metal parts and get a jack. On the second floor, go to the captain's cabin and open the safe by using the found code (automatically). Inside there will be a note (audio cassette) and wires.
On the third floor, look for a small nook with stairs leading to the fourth tier. There, on the floor, look for the key card. One of the passages is blocked by a metal box. Use a jack on him. Look into the office, take the resources from the metal box and read the note on the table. Go down to the floor below and use the key card to open the office on the third floor. There will be a green key on the table.
Climb even higher and open the door with the green key. Take a note (audio cassette) and a lighter from the bed. If you climb even higher, then you will run into a powerful door. She needs a bomb. You have everything to make a bomb. Just go down to the first floor and interact with the table with details in the back room. Blow up the door and go to the top room on the yacht. Pick up the drawings of the steering wheel and motor. There is a note on the helm about Balboa Island. There is a box with resources on the locker on the right.
Balboa Island
Return to the raft. You can build a motor and a rudder, but I used sails and an oar the old fashioned way. Enter coordinates 9744 to locate a new point pointing to Balboa Island. Swim there. This is a high island, so look for a passage between the rocks. Climb up and turn right from the sign that points to the ranger station and relay station 2. Soon you will meet the first bear. These are dangerous enemies, so be patient and careful. Then there will be stakes and a poisonous lake. Jump on boxes and other objects to avoid damage and poisoning.
Go inside the house on the right first. This is a ranger station. On the stand on the right you need to hang a saw, a hammer and Bruno's wrench. On the table on the left is a blueprint for a biofuel purifier. Go to a small utility room and take the first note from the mattress. Climb to the nearest relay tower 2 and search the building. There will be a note.
Go down and follow the signs towards relay stations 4 and 6. At one of the forks with signs, on the left there is a cave and a bear. Climb up the hill next to the signpost and find a locker. Open it to get Bruno's saw. Go back from this pointer. You need to find the second or third signpost with four signs (indicates three relay stations and the rangers' house). There will be another direction, up the slope (none of the signs indicate there). Pick up notes along the way. At the very top you will find mannequins and a cage. Dismantle the mannequin to get a light bulb. And that's not it. Now go down behind the hanging mannequin, down the hill, to see a huge she-bear guarding the cave. You can collect five wild berries and throw them into the blue vat to distract the she-bear. She's bigger than normal bears therefore, it is extremely difficult to defeat her. Inside the cave, pick up the blueprint for the machete. Search the crate for a finished machete. There you will also find a garbage hook and other resources.
Another landmark of this place - you can go around the island and find a beach with a destroyed fence. That is, you do not have to swim in the bay. Climb up from the beach and turn left. There you will find a cave with a bear, and on the left there will be a hill on which there is a light bulb. You can attach it to the mannequin near the ranger's house to get the achievement.
Now follow the signs for stations 4 and 6. Take the exit to station 6. Go up the slope and find the liana cave. Chop them with your machete and go through the entire cave to be next to the station. Climb up and look inside the house for Bruno and Johnny's wrench. Talk to the latter and he will become a new playable character. Also in the room there is a drawing of a gas tank.
Move to station 4. You will see a raised bridge. Stones are scattered on the ground. Grab a few, stand on the edge and aim to the left and above the lever. You must throw a stone so that it hits the lever, and then the bridge will lower. Inside the relay station, look for a note and Bruno's hammer. There is a drawing of a fuel pipe hanging on the wall. Be sure to turn on all three relay stations. You are interested in the square panel inside each station. Hangs on the wall. After that, you will receive new coordinates - 2731. If you hang all the tools on the wall (in the ranger's house), you will find a postcard congratulating the twins. This completes the passage of Balboa Island.
caravan town
Arriving at coordinates 2731, search the wharf for parts of the charger (red and blue wires). Go deep into the island, from below, and find a device in the form of a bicycle, to which a pipe is connected. The pipe goes under water. Swim there, to the depths. Climb into various objects along the way to replenish your oxygen supply. In the end, you will get to the container (not at the very end of the pipe), where you can find a blueprint for a metal detector, a key to the infirmary and a part (steering wheel) for a zipline. There is a note next to the bike and the pipe.
Start climbing up the houses. At the very top, find a couple of Detto's notes and some kind of device standing on the edge. It requires explosive powder. Cross the bridge and climb to the top of the tower. Inside the building you will find Olof's office with a note. Tools are on the table to the left. You need three zipline parts to make a zipline block.
Go around Olof's office and see another bridge. Go to the other side and search different houses. Resources are in the upper lockers, in the lower ones and in the locker on the right. There are a lot of them, so be sure to collect everything you can. Search the upper houses. Next to one of them lies a part for the charger. Go to the other side on another bridge and climb higher to find the third part for the charger.
Now let's find the explosive powder. To do this, return to the raft and study the drawing of the metal detector (found under water). After that, create a metal detector and arm yourself with it. Climb the Olof tower and cross the bridge to another part of the city with many houses. Climb the houses on the right, along the stairs, holding the metal detector in your hands. Stand in a place where the metal detector will be fully lit. Switch to a shovel and hold LMB to dig a safe with resources. Among them will be an explosive powder. Apply it to the device you saw earlier. You will see a parachute doll that will land on an island nearby. Jump into the water and climb this island with the help of the debris. Take Major Tom (doll), fireworks, firework blueprint and the second zipline part.
It remains to find the third part for the zipline. Return down to the pier. Look to the left and look for a green hose on the houses. Climb up along this hose to find a water pump that you can interact with. But first, go along the pieces of the hose and turn their edges so that water gets from one part to another, and so on to the very bottom, into the well. Made? Pump water 10 times, go down and find that the well is full, and the third detail from the zipline has surfaced.
Climb the Olof tower and create a zipline block inside it. Equip it the same way you would a headlamp. Climb Olof's house and find the rope leading to the mayor's house (MAYOR). Roll down there by interacting with the rope. Inside the house there is a table on which three parts from the charger should be applied. You will receive a complete charger. We have already found all three details, and this is described above.
There is also a chest, but the mayor's key is required. On the table is the mayor's hat, which you can pick up. We need to find the key. Set off again at the top of Olof's tower and this time ride the other rope towards the infirmary (large green cross). Pass by the pigs and go up to the main building of the infirmary. Open with the key found earlier, at a depth. After doing this, take Henrik's note and the key to the mayor's chest. Return to the mayor's office, open the chest and take the blueprint for the engine control device. There will also be a note with the coordinates of Tangaroa - 2430.
Tangaroa
Enter the coordinates and swim to the specified marker to get to the city under the dome. Immediately at the entrance there will be a sign that indicates where and what is located. To the left is the generator room, cafeteria, and storage, while to the right is the elevator, plantation, and exit to the surface. To begin with, we go to the left side, to the cafeteria. Once inside, pick up a note from the table nearby. The room on the right also has the first part for the generator. And be sure to take a weapon with you, because there are a lot of rats in the cafeteria. Exit the cafe through another door. Do not turn anywhere, but go forward and to the right. At a dead end near the grate, the second part for the generator is lying around.
Continue following the sign and go to the Storage Area. To the left, under the broken stairs, is the third part for the generator. The way through the warehouse is blocked by containers. Climb the stairs to the generator and set all three parts in place. Now you can use the crane control panel to move the containers. And here many will face a problem: there is a bug in the game, and the tap only works if you play with Steam online enabled. In offline mode or on a pirate, this puzzle will not work.
To be continued…
Comments
Post a Comment