How to get through the first few nights
Sons of the Forest throws you into the thick of things during the first minutes and throughout the rest of the game refuses to explain what and where to do, how to survive, and so on. In this guide, we will show you how to get through the first few nights, after which you will already have a more or less correct idea of \u200b\u200bthe process of survival.
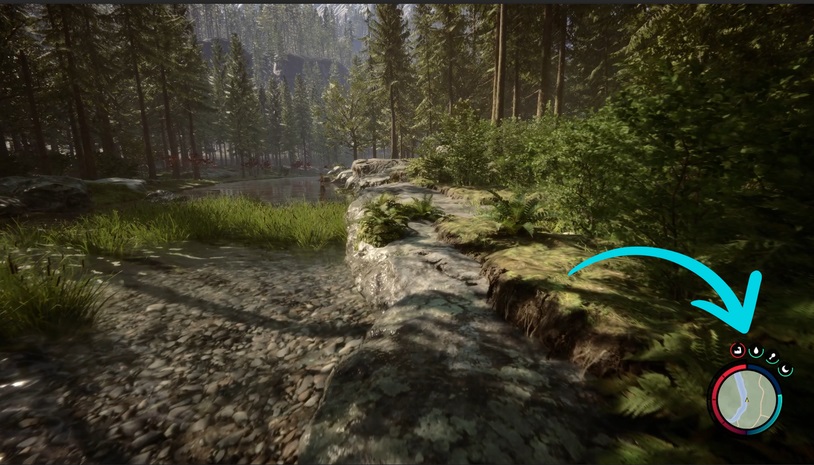
Start Location
There are several different places where you can spawn when starting a new game. If you don't like the starting point, you can safely restart the game. For the best start, we recommend starting by landing in the forest to be right in the middle of key events and close to some of the most important sights and underground caves.
Take care of basic needs
Yes, it goes without saying, since we are talking about survival, but because of the colorful landscapes and unusual setting, it is easy to get carried away with research and construction and forget about the basic needs of the character. As a rule of thumb, don't rely on energy drinks, prepared foods, and anything else found in campsites and underground bunkers. Leave all these supplies as a last resort if you get stuck in a cave or run out of water during the winter season. Press the E key (but don't hold it) to pick up foods and avoid accidentally eating them (while holding, you instantly use the found item).
The best way to take care of your basic needs is to make full use of the island and its native fauna while exploring it. In the first few days, we recommend catching animals, fishing, and collecting berries, and key items that will help you prepare for survival throughout the game. Winter will come around day 10, so stock up on as much food and water as possible in advance.
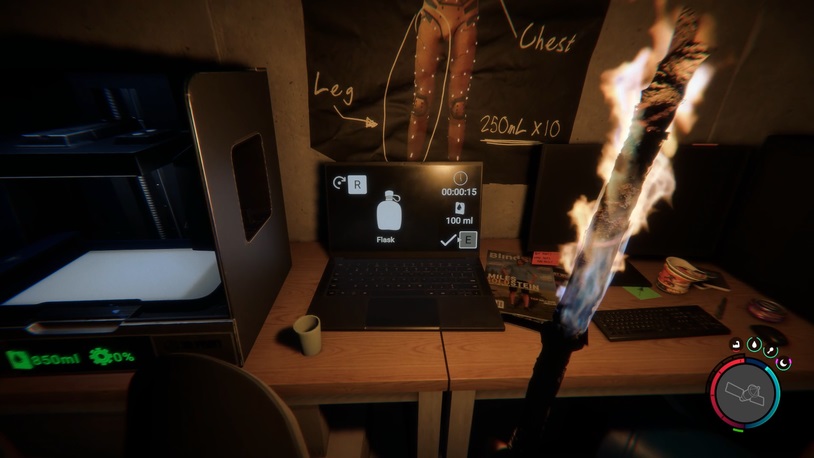
Make a flask
As for the key items for survival, you need to find a 3D printer and print a flask on it. Earlier I wrote that it is best to spawn early in the game in the forest, and one of the main reasons for this is that there is a 3D printer located nearby.
There are four printers on the island. Making a flask will cost you 100 ml of resin. Fortunately, a sufficient amount of resin can be collected already in the same room where the 3D printer itself is located, or in nearby storage rooms. Craft a flask first, then fill it up at any source of fresh water. You can control the amount of water in a flask by opening the crafting menu (or inventory) with the I key. There is a blue bar below the flask that shows how full it is.
While you have access to the printer, be sure to craft some arrows and a red mask. The red mask will allow you to blend in with the cannibal enemies in their camps and they won't attack you. Make sure to put it on before approaching such a camp so the cannibals don't become hostile. So you can search this place without hindrance.
Learn to store meat and fish
Instead of preparing food right away, set aside cooked meats and fish. This will take some time, but you can create several drying cabinets at once, and fill them with provisions. It takes 13 sticks to make one cabinet. Ask Kelvin to help you collect them by first building storage for sticks and having a companion fill it.

If you want to go fishing, head to the water before winter sets in and make yourself a spear using 2 sticks, tape, and a knife. Armed with a spear, aim into the water and strike at the fish that will swim by. Or ask Kelvin for help again, and he will go fishing to the nearest body of water. Please note that you can only send Calvin fishing if you are near a body of water.
After building the food storage, let's explore the island and look for other key items, including weapons.
Conservation and recreation
In the first few days, build a small base or find a ready-made shelter that allows you to regularly rest and save. Explore the surrounding locations, collect equipment, and be sure to rest in some visited places (for example, in an underground bunker where a 3D printer is located). You will also find campsites (where weapons are stored), where you can save and rest (in a tent).

What to make/find first
Above, I talked about making a flask, which must be constantly filled with water. Yes, it should be your first priority for quenching your thirst, but it's not the only thing you need to focus on right from the start. I recommend getting a scuba gear, a rope thrower, and a shovel, which we talk about in a separate guide.
Scuba gear (along with a shocker) can be found in a cave in the north, a cable launcher in a cave in the west, and a shovel in a cave closest to the central mountains. It is worth collecting items in a strictly defined order since a rope thrower cannot be obtained without scuba gear and a shovel without two other tools. After finding all three items, you will be able to explore most of the island, dig out access hatches to other underground bunkers and, most importantly, get your hands on a shotgun.
Search for weapons
Most of the weapons in Sons of the Forest are located in the western and northern parts of the island. Moreover, in the west, you can find both firearms - both a pistol and a shotgun. Saving ammo is key in the game, however, the more firepower you get, the better, and you can even equip your companions with weapons (like Virginia).

The gun can be found on the raft by looking for a GPS locator located in the western part of the island. The raft is located in the middle of the water. To get the shotgun, you will need a shovel, which you can use to dig up the weapon from the grave in the northeast.
We also recommend finding a modern ax - it is slower compared to the tactical one, but does significant damage. When trying to hit any enemy with a melee weapon, aim for their head to deal increased damage. In a separate guide, we reviewed all the weapons available in the game.

Base building
Use ready-made structures to create a small base at the beginning of the game. The first few days you will see strange mutants and cannibals, but they usually just watch you. While this is going on, try to collect trackers, some food, some key items, and equipment, and then think about building a base. On the third or fourth day, it is worth laying the foundation.
Find a place close to trees and water. This will help you stay hydrated, and with more trees, you can chop down as many logs as you need to create a solid shelter. There should be enough room for a bed so you can rest and save. You can create a small house or use a ready-made project from a log house.

Be sure to include shelves to store food, medicine, and other items you find while traveling. The same goes for storage racks for logs, bones, stones, and sticks. Finally, create a protective wall. Take the log and rotate it to stand upright (perpendicular to the ground). Then aim your scope at the top of the log and chip it off for a sharp stake.
Armor
If you have found a modern ax or created a spear and have already begun to explore the caves, you will soon encounter mutants with whom you will have to fight an unequal battle at first. As soon as you kill the first enemies, skin them to create regular armor. Keep doing this until you fill-up the armor gauge near the health bar.
As soon as you set up a base and cannibals start running towards it, whenever you kill enemies, throw their bodies into the fire. This way you will get bones that you can leave in storage and use in the future to make armor.
Comments
Post a Comment